Managing 301 Redirects
Why use redirects?
When you rename a tour, deactivate a trip, or restructure your website, the old URLs can return 404 errors. If Google is still crawling those old links — or if customers have bookmarked them — you’ll lose traffic and SEO value.
A 301 redirect permanently sends visitors (and search engines) from the old URL to the correct new one, preserving your search rankings.
How to create a redirect
- Go to SEO Center > Redirects.
- Click the Create Redirect button.
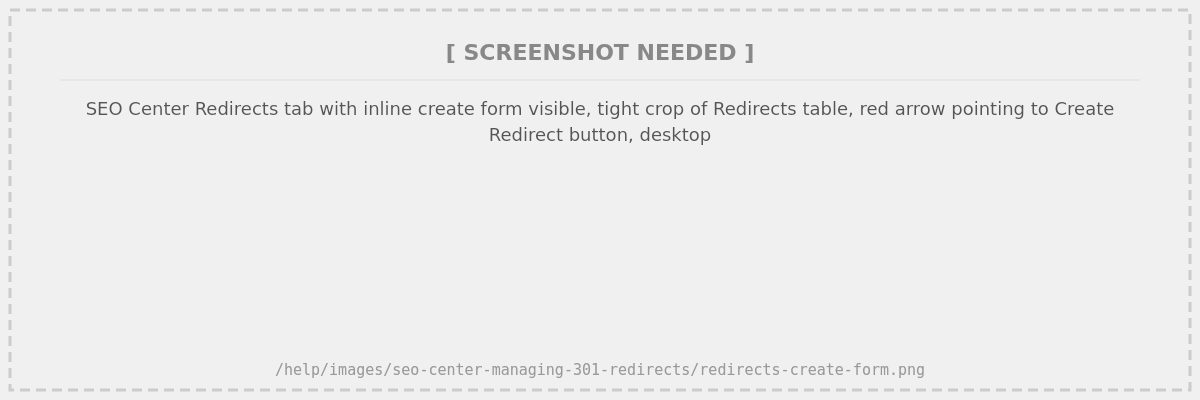
- Enter the source path (the old URL path, e.g.,
/old-tour-name). - Enter the target path (where visitors should go, e.g.,
/new-tour-name). - Click Save.
The redirect takes effect immediately on your website.
Validation rules
- The target path must start with
/. - The source and target paths cannot be the same.
- You cannot create a redirect from a path that belongs to a live page on your website.
If you create a redirect with a source path that already has a redirect, it updates the existing one instead of creating a duplicate. You’ll see a message like “Existing redirect for ‘/old-path’ updated to point to ‘/new-target’”.
How to edit a redirect
- Find the redirect in the list (use the search bar to search by source or target path).
- Click the redirect to edit the target path.
- Save your changes.
How to delete a redirect
- Find the redirect in the list.
- Click and hold the delete button (this prevents accidental deletions).
Redirect chains
A redirect chain happens when URL A redirects to URL B, which then redirects to URL C. Chains slow down page loads and can hurt SEO.
SEO Center handles chains automatically:
- On create: When you create a new redirect, the system checks for chains and flattens them automatically (A → C instead of A → B → C).
- Fix Chains button: Click this to scan and resolve all existing redirect chains at once.