Adding Images inside Itinerary
This article describes an older workaround. If you’re adding images to a multi-day itinerary, we strongly recommend using day-wise itinerary segments instead — each day gets its own section with a rich text editor, photo, map location, and automatic route maps. It’s a much better experience for your customers than embedding images in a single text block. You can also upload images directly from the editor without the URL-copying workaround described below.
At the moment we don’t have an inbuilt option to add images inside the itinerary, but we do have an option in our text editor that allows you to add images.
Quick Overview
Steps to Add images to the Itinerary of a tour:
- Upload all images to that tour’s gallery.
- Obtain the URL of an image from the tour gallery.
- Upload the image to Rich Text Editor.
Upload all images to that tour’s gallery
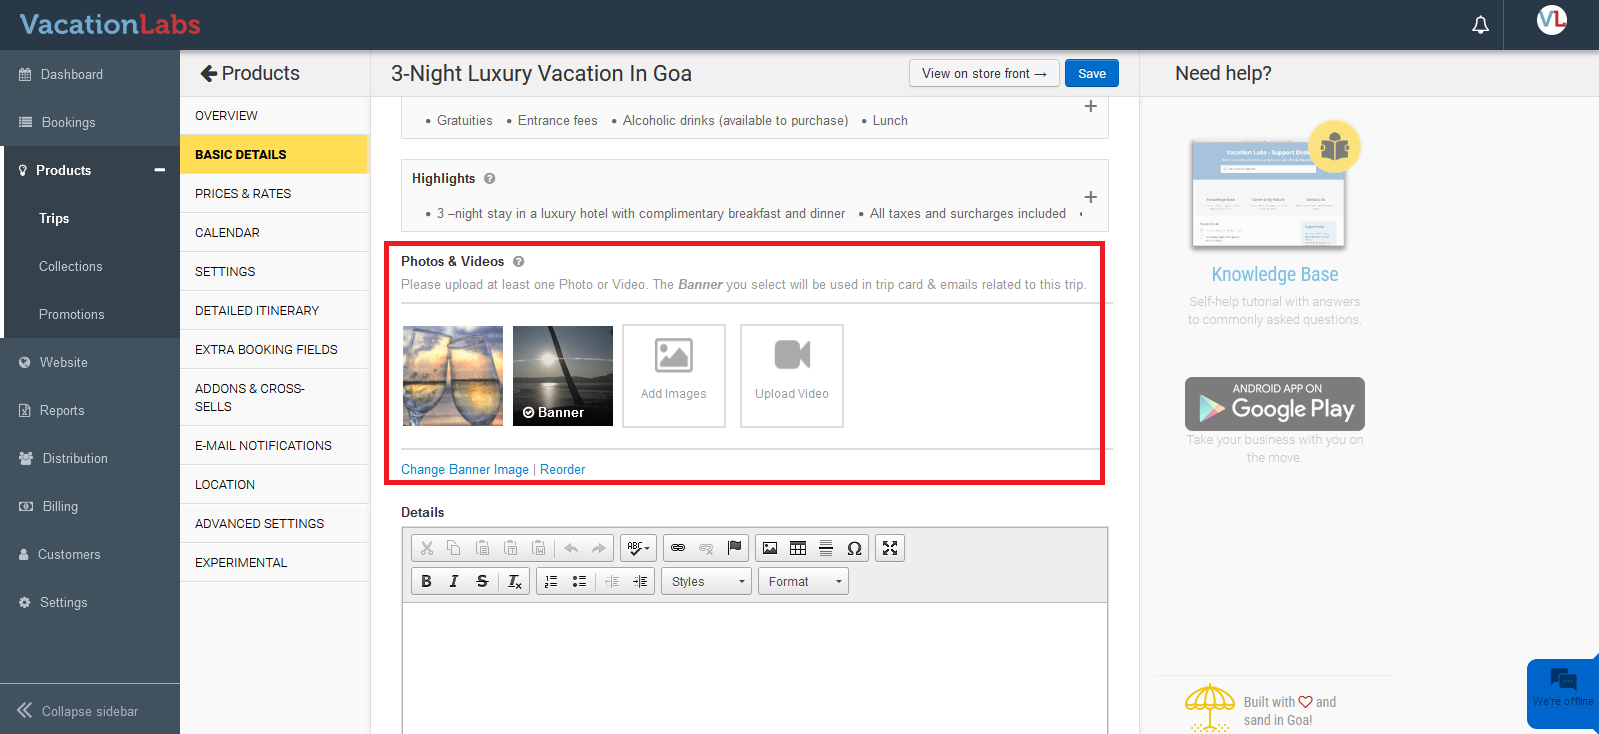
Upload all images you want to add to the itinerary in the relevant tour by navigating to Products > Trips > Edit the trip > Basic Details. Here, under Photos & Videos, you can upload all images. To learn more about how to upload images to the tour gallery, please CLICK HERE.
Obtain the URL of an image from the tour gallery
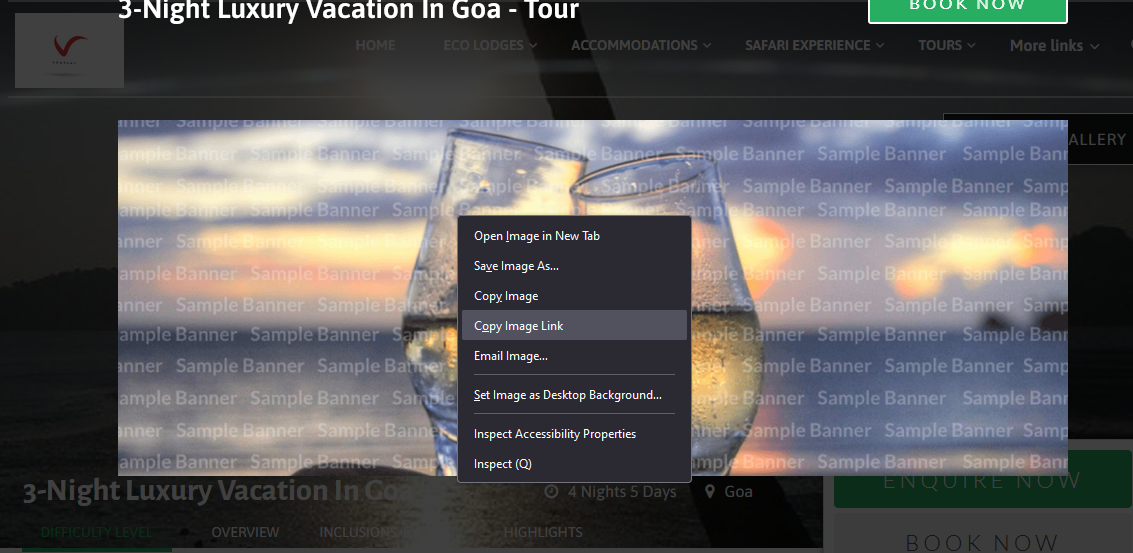
After uploading all the images, please navigate to the storefront of that tour page. When you click on the Banner Image, you will see the photo gallery where all the images are uploaded. Now, open the required image that needs to be added to the itinerary section, right-click on it, and select “Copy Image Link.”
Upload the image to Rich Text Editor
Navigate to Products > Trips > Edit the trip > Detailed Itinerary. Here, in the Rich Text Editor, keep the cursor where you wish to add the image and click on the Image Icon at the top.
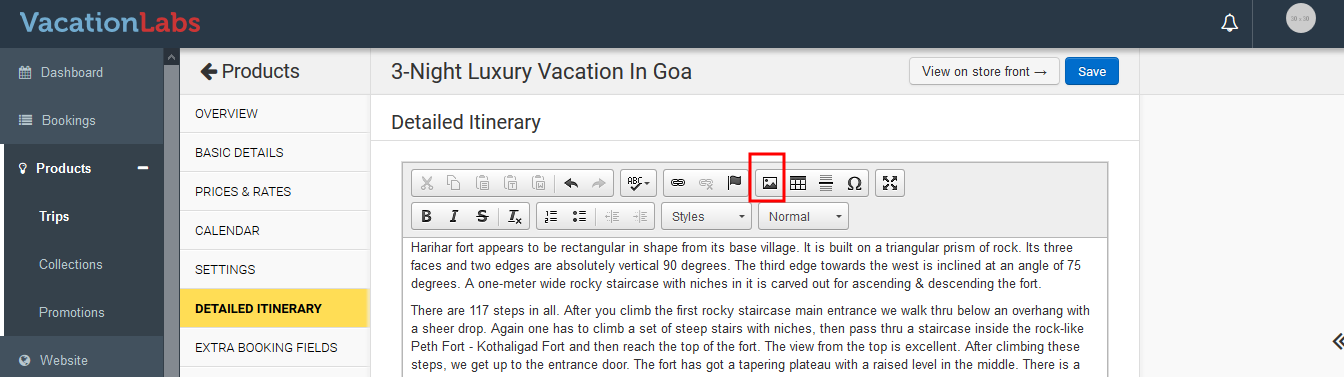 Enter the URL that you copied and enter the Height & Width (we would recommend you to keep it 250 x 250). Add the alignment if required and save the changes.
