How to Create a Day-Wise Itinerary for Your Tours
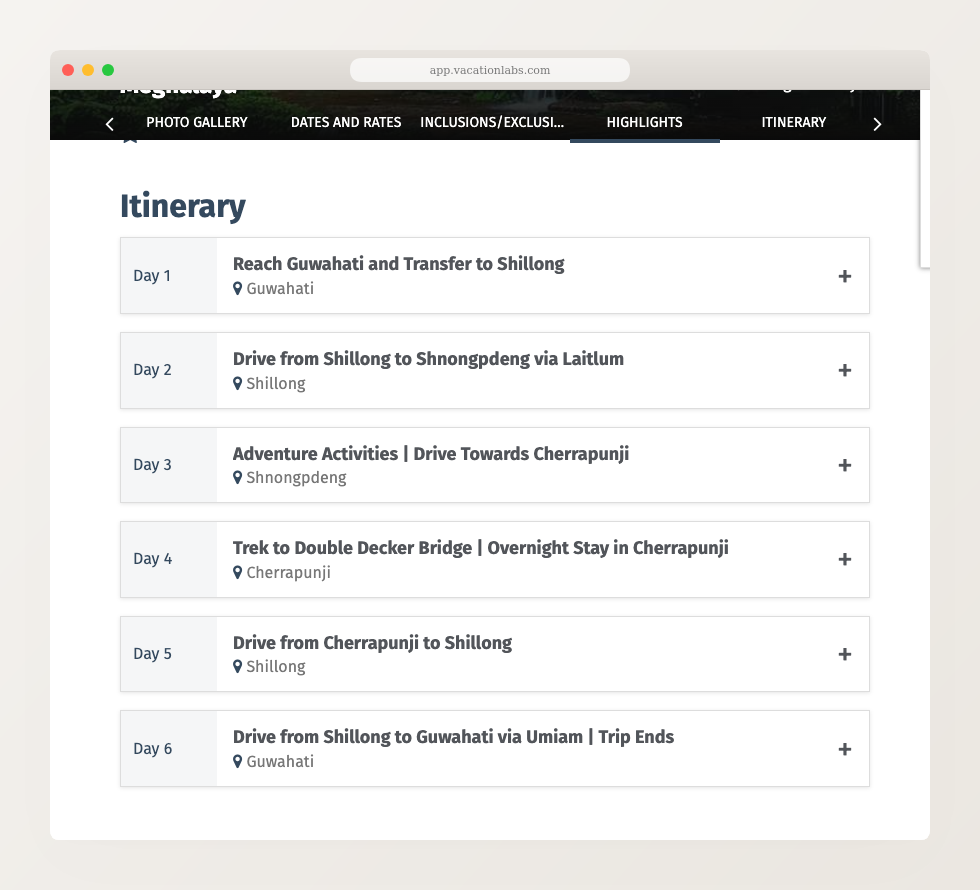
Instead of writing your entire itinerary in a single text block, you can break it into day-wise segments — each with a title, location, and rich-text content. On your tour page, segments appear as collapsible cards that visitors can expand to read each day’s details. When your segments include locations, a route map is automatically generated showing the tour route on a map.
Enabling Day-Wise Itinerary
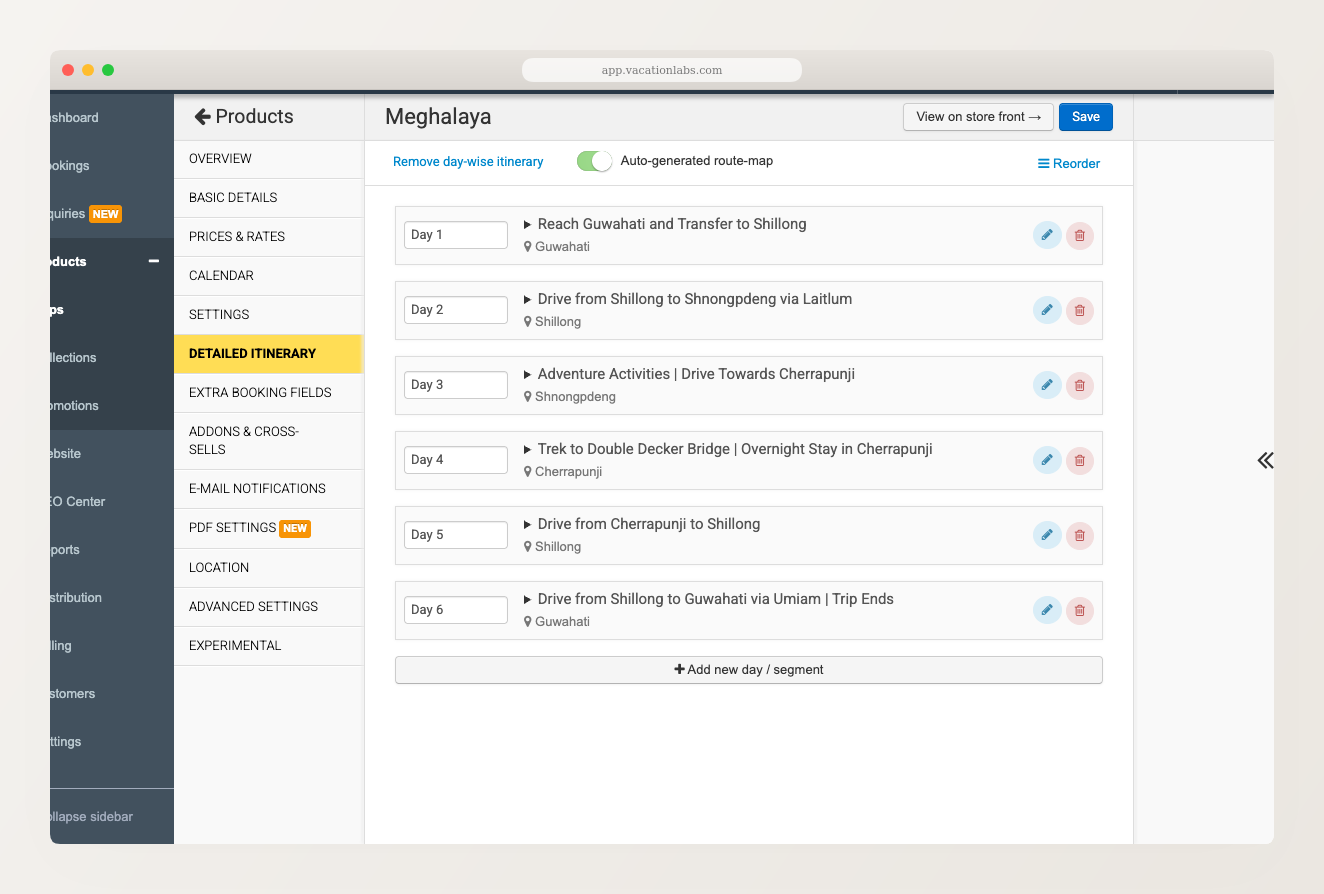
- Go to Products > Trips and edit the tour.
- Click Detailed Itinerary in the left sidebar.
- If you see a single rich-text editor, click the option to switch to day-wise itinerary.
- If you already see day-wise segments listed, the feature is already enabled.
At the top of the page you’ll see:
- Remove day-wise itinerary — switches back to the single rich-text editor (your content is preserved)
- Auto-generated route-map toggle — controls whether a route map appears on your tour page
- Reorder — lets you drag segments into a different order
Creating & Editing Segments
Click + Add new day / segment to create a new segment, or click the pencil icon on an existing one.
The edit panel has four fields:
- Title / Summary — a short description of the day (e.g., “Reach Guwahati and Transfer to Shillong”)
- Location displayed to users — the place name shown on the tour page (e.g., “Guwahati”)
- Precise location for route map — use the Google Maps search to set exact coordinates. This is what places the marker on the auto-generated route map.
- Content — a rich-text editor for the full day’s description, including images and formatting
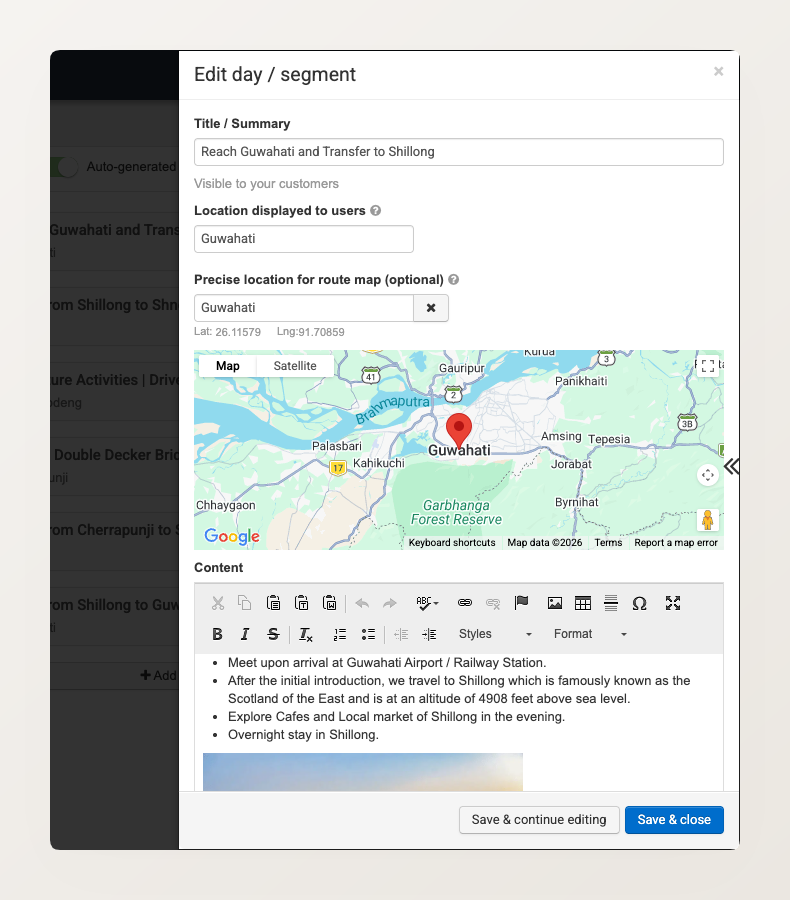
Click Save & close when done, or Save & continue editing to keep working.
The day label (Day 1, Day 2, etc.) is auto-numbered based on the segment’s position. You can edit the label text if needed — for example, changing “Day 1” to “Day 1-2” for multi-day segments.
Automatic Route Map
When your itinerary segments have precise locations set, a route map is automatically generated on your tour page. The map shows markers for each location connected by a route line.
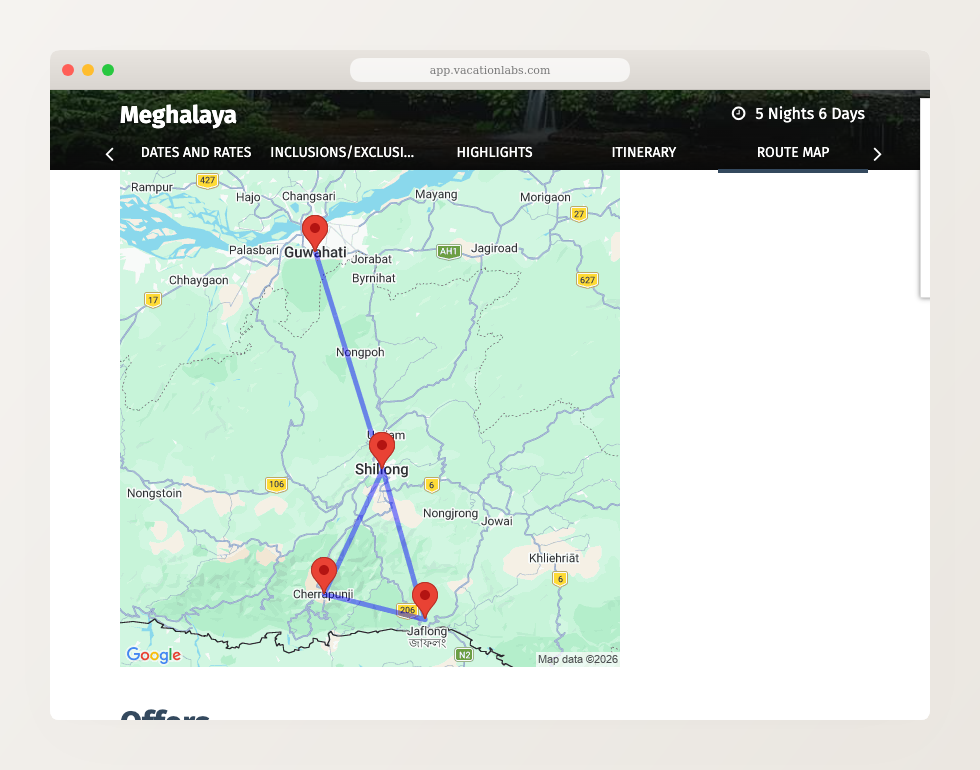
You can toggle the route map on or off per trip using the Auto-generated route-map switch at the top of the Detailed Itinerary page.
If you already have a custom Google My Maps embed for a tour, you can disable the auto-generated route map for that trip and keep using your custom map.
Switching Back to Detailed Itinerary
Click Remove day-wise itinerary at the top of the page to switch back to the single rich-text editor. Your segment content is preserved — you can switch back to day-wise segments later without losing data.
Limitations: The auto-generated route map is a static image (no zoom or pan). Day numbering is automatic — there’s no manual override for non-sequential numbering. The route map uses Google Static Maps, which has a different look from Google My Maps embeds.
Related Articles
- How to create Route Maps via Google My Maps — manual route maps using Google My Maps (alternative to auto-generated maps)
- Adding images inside itinerary — adding images to the rich-text itinerary editor
- Managing Tour Page Sections — controlling which sections appear on your tour pages