Inquiry Form Section
Overview
The Inquiry Form section lets you place a customizable lead-capture form on any page — your Contact page, a destination landing page, an About Us page, a blog post, or anywhere else you want visitors to reach out.
You can display the form inline (embedded directly in the page) or as a modal popup (opened by clicking a button). Each form can have its own fields, success message, and email settings — and you can place multiple forms on the same page.
This replaces the need for third-party form embeds like Google Forms, Jotform, or Typeform. Forms are built natively in your backoffice, submissions go straight to your inquiry list, and spam protection is built in.
The inquiry form section is for static pages, collection pages, and blog posts. If you’re looking to add a popup inquiry form on a tour page, that’s a separate feature configured per-trip under Products > Trips. See Activating and Setting up Pop-up Inquiry Form.
Adding an inquiry form section
-
Go to Website > Pages and click the page you want to edit.
-
Click Add Section and choose Inquiry Form from the dropdown.
-
Enable the section using the toggle.
-
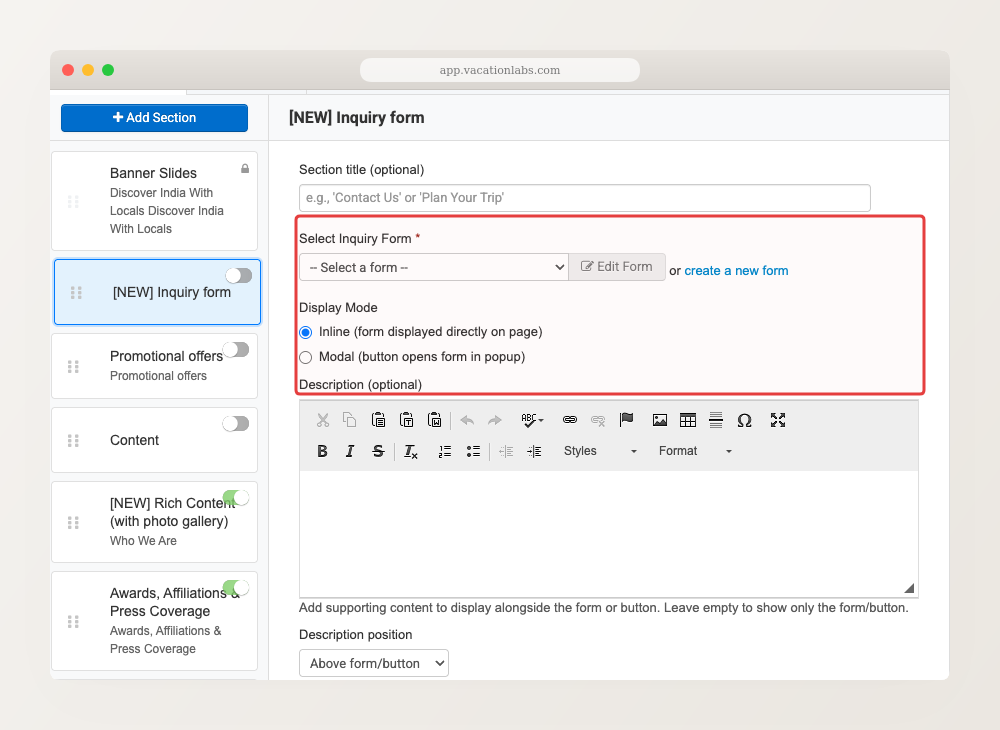
Click on the section to open its settings.
-
Select an existing form from the dropdown, or create a new one (see Customizing form fields below).
-
Choose a display mode — inline or modal (see next section).
-
Click Save.
You must select a form before the section will appear on your website. If no form is selected, a validation message will remind you.
Display modes: inline vs modal
The inquiry form section supports two display modes:
Inline — the form is embedded directly in the page content. Visitors see the form fields without clicking anything. Best for pages where the form is the main purpose, like a Contact page or a “Plan Your Trip” landing page.
Modal — a button is displayed on the page. Clicking it opens the form in a popup overlay. Best for pages where the form is secondary — a destination page where visitors browse first and inquire later.
You can mix both modes on the same page — for example, an inline form near the top and a modal button further down.
Use inline when the form is the page’s primary call to action (Contact Us, Get a Quote). Use modal when you want the form available but not dominating the page layout.
Adding a description
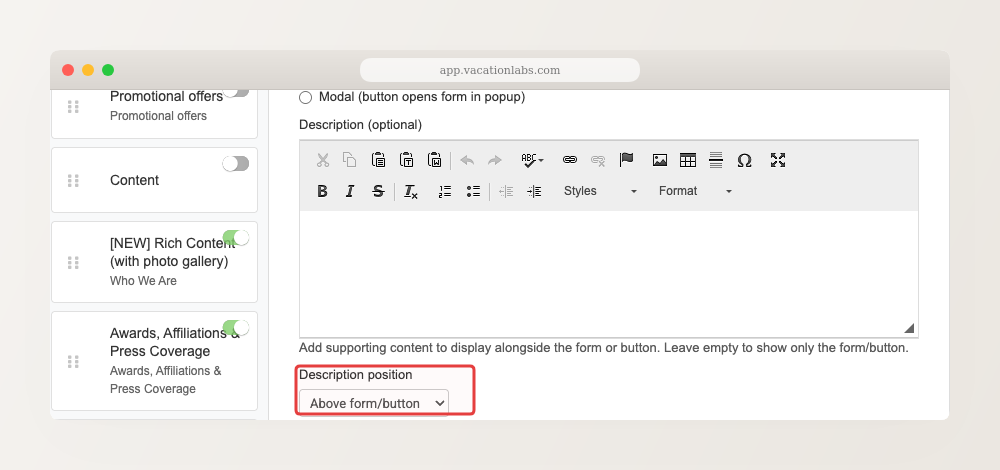
Each inquiry form section can include an optional rich-text description — introductory text, a heading, or supporting information displayed alongside the form.
You can position the description relative to the form:
- Above — description appears above the form
- Below — description appears below the form
- Left — description on the left, form on the right (two-column layout)
- Right — form on the left, description on the right (two-column layout)
When using left or right positioning, the form automatically switches to a single-column layout to fit the narrower space. Both the description and form are vertically centered.
Customizing form fields
When you select a form (or create a new one), you can customize its fields:
- Click Add Field to add a new field.
- Choose a field type: Name, Email, Phone, Date Picker, Comments, or Pax Count.
- Set the field name — the label visitors see.
- Optionally add placeholder text, help text, and a prepend icon.
- Mark the field as mandatory if required.
- Click Save.
To edit an existing field, click the Edit link next to it. To delete a field, click the X icon under the Remove column.
To reorder fields, click the Reorder button, then drag and drop fields into the order you want. Click Update when done.
Standard fields (Full Name, Email, Phone) come with default placeholder text automatically — you don’t need to set it manually.
Dropdown and multi-select field types are not yet available in inquiry forms. These are planned for a future release.
Form settings
Click Inquiry form settings to customize:
- Form title — heading displayed above the form fields
- Submit button text — the text on the submit button (default: “Submit”)
- Form success message — the message visitors see after submitting
- Email subject — subject line of the notification email you receive
- Email content — body of the notification email
Spam protection
Inquiry forms include built-in invisible reCAPTCHA — no manual setup or API keys required. The system automatically detects suspicious activity and challenges repeated submissions.
This works for both inline and modal forms, and even when multiple forms are on the same page.
Viewing inquiries in the backoffice
Submitted inquiries appear in your backoffice inquiry list. Each inquiry shows:
- The page URL where the form was submitted — so you know which page generated the lead
- The form name — useful when you have multiple forms on the same page
Related Articles
- Managing Website Sections — add, reorder, and customize sections
- Understanding Your Website Pages — page types and section support
- Managing Inquiries — view, search, assign, and manage all your inquiries
- Activating and Setting up Pop-up Inquiry Form — inquiry form popup on tour pages (different feature)