Rich Content Section with Photo Gallery
Overview
The Rich Content section lets you add free-form text paired with an optional photo gallery carousel to any page on your website. Use it for destination descriptions, “why choose us” sections, detailed explanations with supporting photos, or any content that benefits from a text-and-images layout.
Rich Content sections are available on static pages (Homepage, About, Contact, landing pages), collection pages (section-based layout), and blog posts (via the Content Sections tab).
If you previously used a “Description” section, it has been automatically upgraded to Rich Content. Your existing content is unchanged — you now have the additional option of adding a photo gallery to it.
Adding a Rich Content section
-
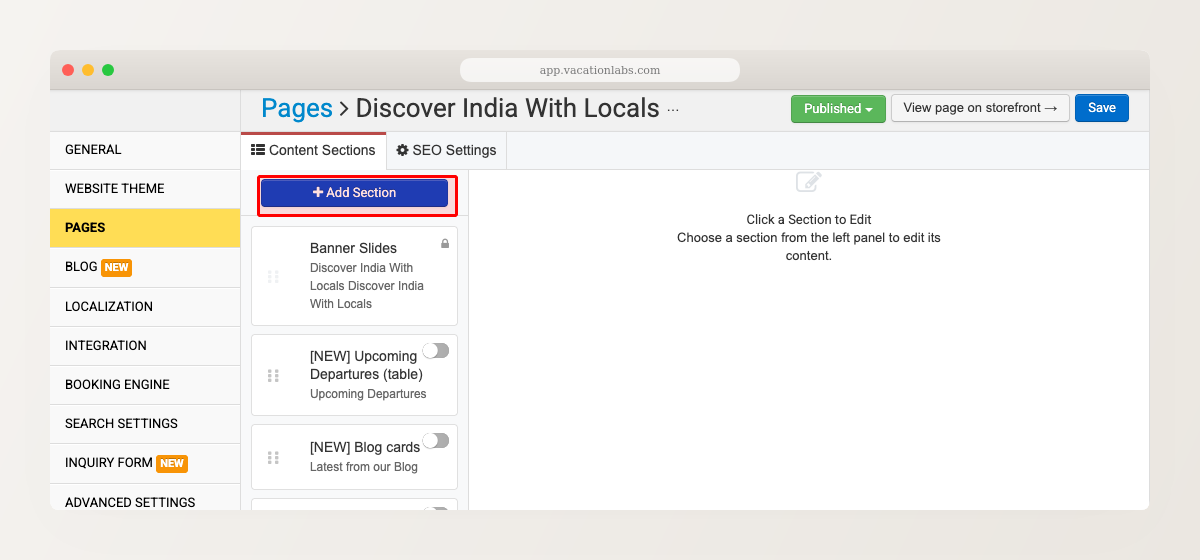
Go to Website > Pages and click the page you want to edit.
-
Click + Add Section and choose Rich Content (with photo gallery) from the dropdown.
-
Click the toggle to enable the section, then click it to open the editor.
-
Enter a Section title and your text in the rich text editor. You can format text with bold, italic, strikethrough, links, and blockquotes.
-
Click Save.
For general section management (reordering, disabling, deleting), see Managing Website Sections.
Adding a photo gallery
To add a photo gallery carousel to your Rich Content section:
-
Open the Rich Content section editor.
-
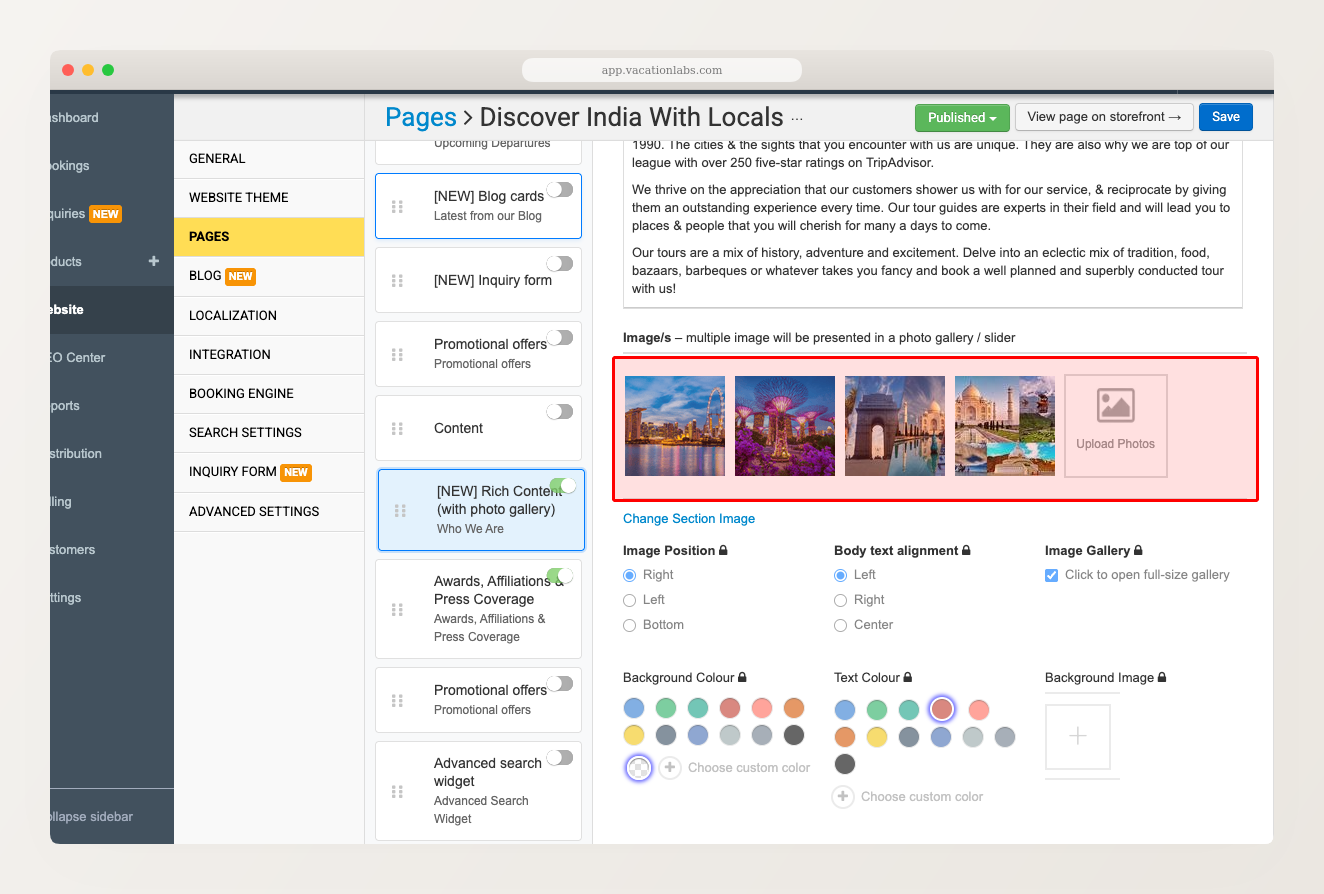
Scroll down to the Image/s area and click Upload Photos to upload one or more photos.
-
Upload a single image for a static image alongside your text, or upload multiple images to create a swipeable carousel.
On the storefront:
- Single image — displays as a static image next to (or above/below) your text.
- Multiple images — displays as a carousel with navigation arrows. Visitors can swipe through images on mobile or click arrows on desktop. Clicking any image opens it in a full-size lightbox gallery.

Choose high-quality images that are at least 1024px wide for the best results. The platform automatically serves smaller versions on mobile devices, so you don’t need to worry about page load speed.
Image position and text alignment
Below the images area, you’ll find controls for how images and text are arranged:
-
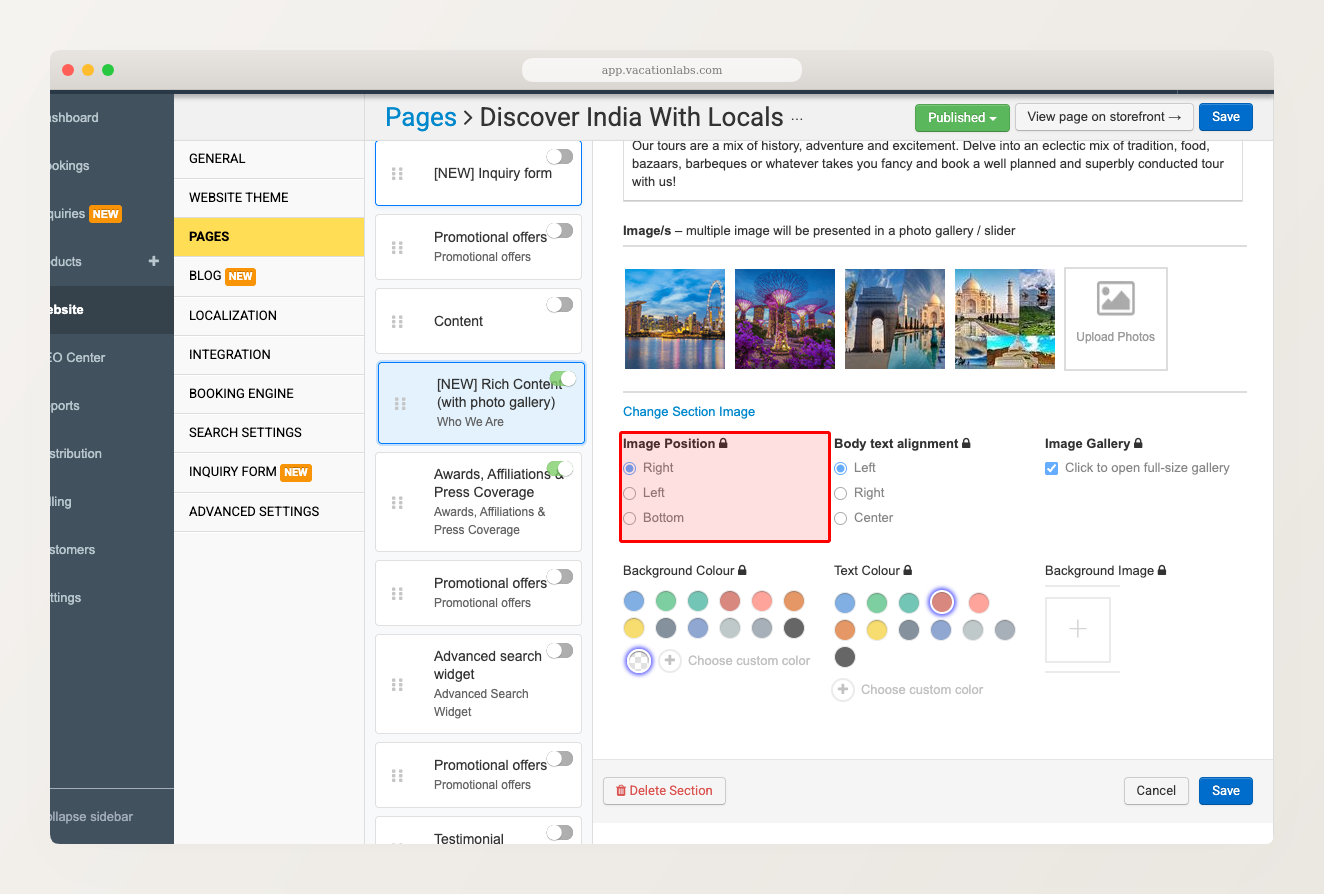
Image Position — controls where the images appear relative to your text:
- Right (default) — images on the right, text on the left
- Left — images on the left, text on the right
- Bottom — images below the text
-
Body text alignment — controls how the text is aligned within its column: Left, Right, or Center.
-
Image Gallery — when checked, visitors can click any image to open it in a full-size lightbox gallery.
On mobile, left/right layouts automatically stack vertically (images on top, text below) so everything remains readable on smaller screens.
Styling options
You can further customize the section’s appearance:
- Background Colour — choose from preset color swatches or pick a custom color
- Text Colour — choose from preset color swatches or pick a custom color
- Background Image — set a background image behind the section content
The Rich Content photo gallery is available on static pages and collection pages. Tour pages have their own dedicated Photo Gallery section — see Add or change photos on a tour for tour-specific images.
Related Articles
- Managing Website Sections — add, reorder, enable, disable, and delete sections
- Banner images and focus points — guidelines for banner images and focus point selection
- Add or change photos on a tour — managing the tour page photo gallery