
Adding and Managing Team Members
Overview
You can invite team members and control what they can access from Main menu > Settings > Users & Permissions. The user list is split into Active and Inactive tabs with counts, so you can quickly see who has access.
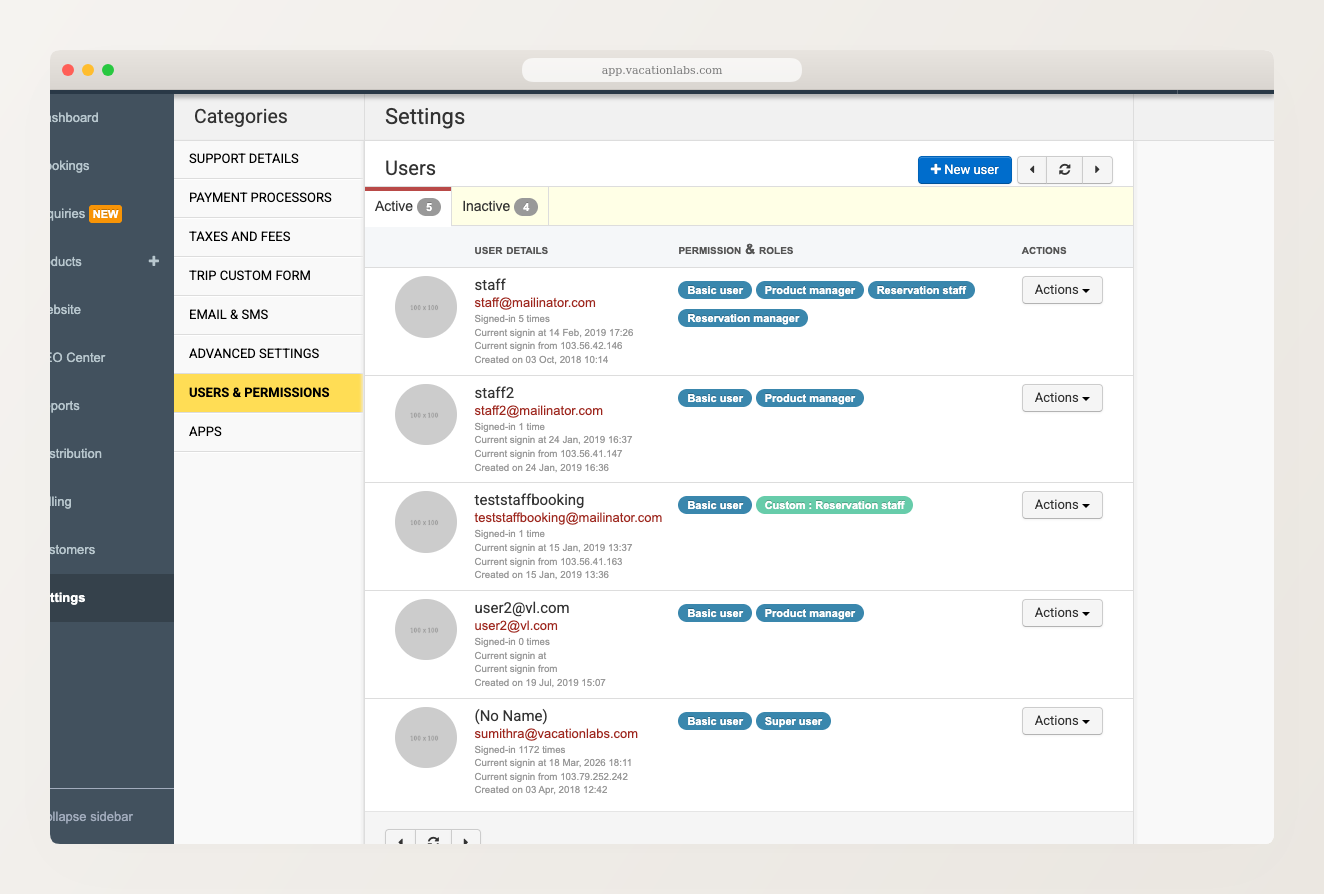
How many team members can you add?
Every plan includes unlimited team logins, so you can give everyone who works on your account their own login instead of sharing a single one. Each person signs in with their own email and password, you control what each of them can change through roles and permissions, and every action is tied to the individual who performed it.
Give everyone who works on your account their own login rather than sharing one. Separate logins are more secure, give you a clear record of who did what, and let you grant each person only the access they need, at no extra cost. “Unlimited” is capped at 100 logins per account as a safeguard against abuse, comfortably more than any tour operator’s team needs. If you genuinely need more, just let us know and we’ll raise it. If several people are already sharing a login, see Are multiple people using the same login? in the account security guide.
Adding a new team member
- Go to Main menu > Settings > Users & Permissions.
- Click + New user.
- Enter the following details:
- Name — the team member’s display name.
- Email — this will be their username for logging in.
- Password — set an initial password. The user can change it after logging in.
- Phone Number — their personal mobile number with country code (e.g., +91 98765 43210). Minimum 8 characters.
- Assign their access rights (see below).
- Click Create.
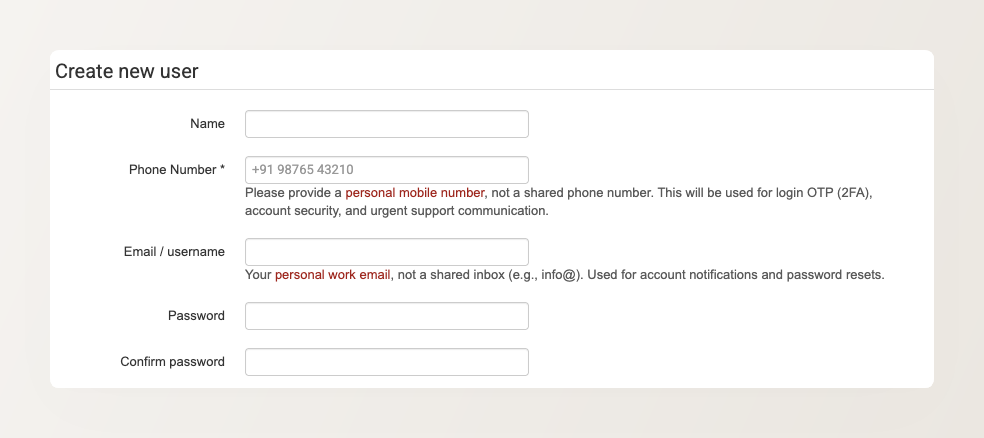
Share the login credentials (email and password) with the team member so they can access their account.
The phone number must be a personal mobile number, not a shared number. It will be used for login OTP, account security, and urgent support communication.
Assigning roles & permissions
When creating or editing a user, you assign Access Rights that determine what they can do in the backoffice. You can choose from pre-set roles:
- Product Manager — manage trips, products, pricing, and related settings.
- Content Manager — manage website content, collections, and static pages.
- Reservations Staff — handle bookings, inquiries, and reservation reports.
- Reservations Manager — manage all aspects of bookings, payments, and reports.
- Finance Manager — handle payments, refunds, and financial reports.
- Super User — full access to all system settings and controls.
- Event Crew — manage check-ins, check-outs, and on-ground booking activities.
- Supplier — manage trips, booking capacity, and supplier-related reports.
- Marketplace Supplier — manage trips, bookings, payments, and content for marketplace operations.
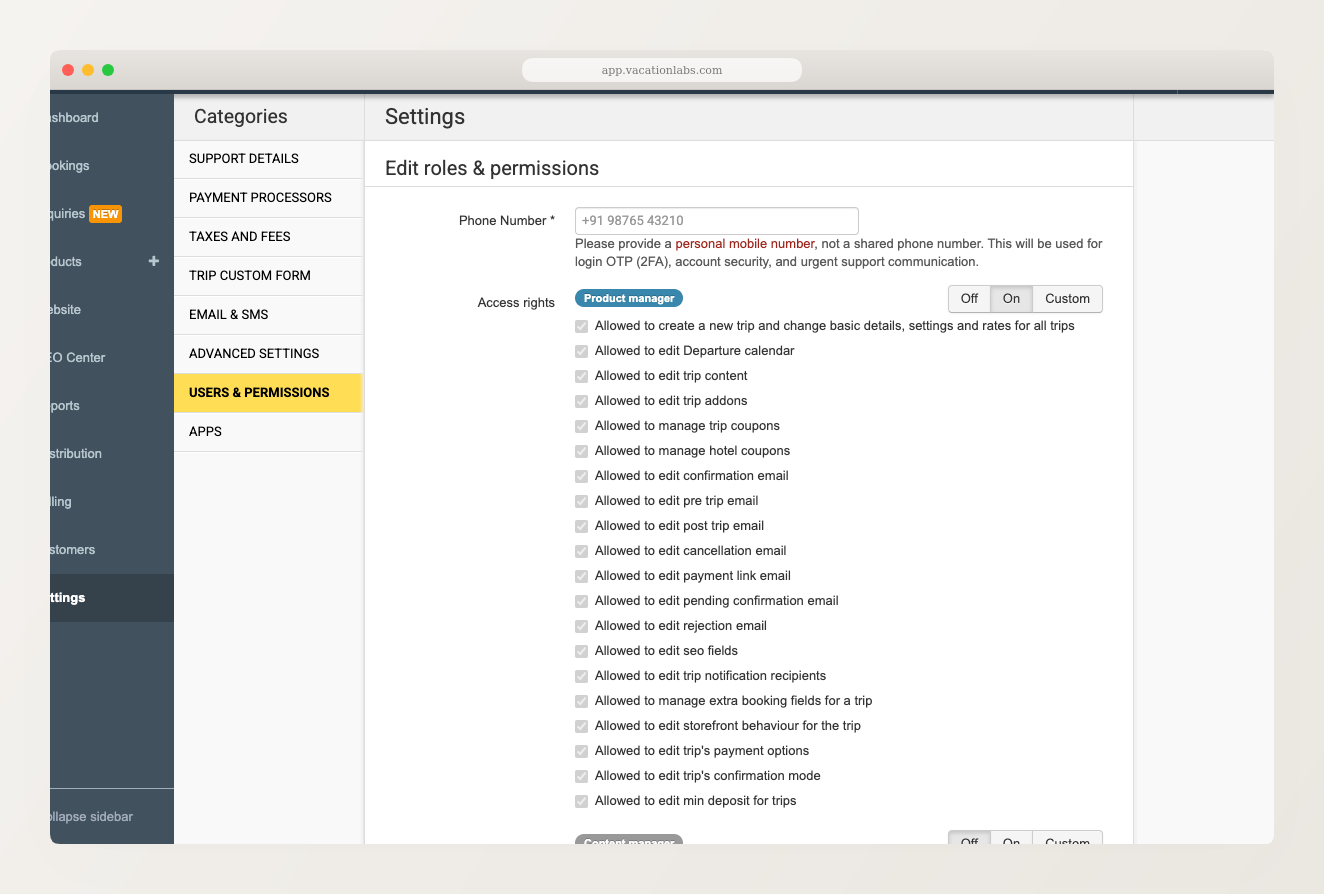
Each role can be toggled On, Off, or set to Custom. With On, the role grants its full set of permissions — shown ticked, but not individually editable. With Custom, each permission becomes a checkbox you can turn on or off one by one.
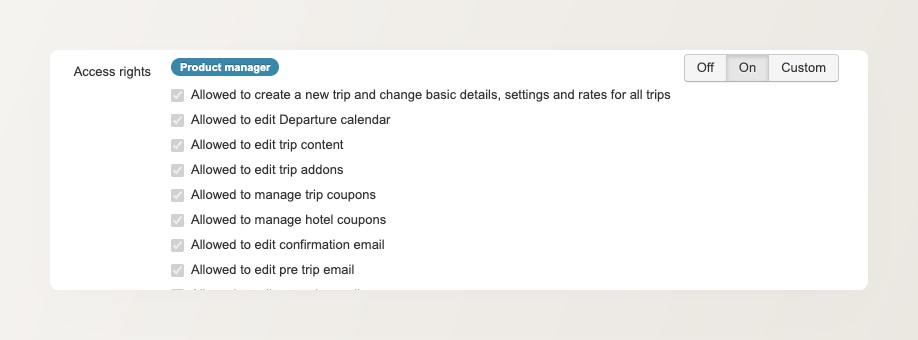
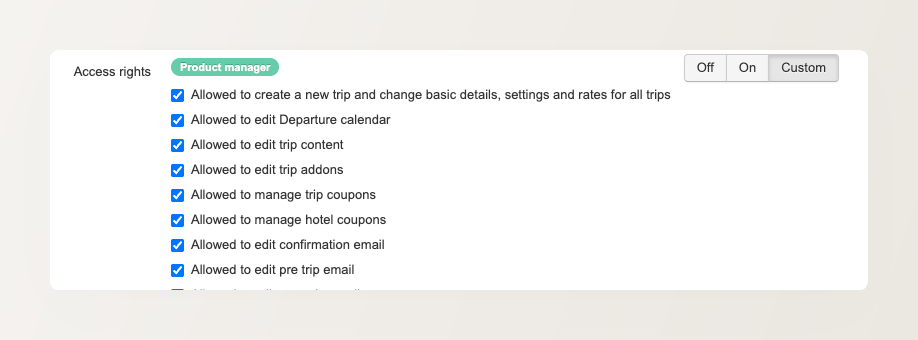
A user can see all sections of the backoffice, but they can only modify areas they have permissions for.
Beyond the pre-set roles, setting a role to Custom lets you grant individual permissions — for example, giving someone access to the Analytics dashboard on its own, without making them a Super User (see The Website Analytics Dashboard).
Grouping staff into teams (tags)
When creating or editing a team member, you can add one or more tags in the Tags field to group your staff into teams. Tags are saved when you click Save.
Right now, tags are used for one thing: automatic inquiry assignment. An assignment rule can round-robin new inquiries within a tagged team — for example, sharing every North India inquiry among the agents you tag north-india-team. See Automatic Inquiry Assignment (Round-Robin) and Staff Visibility.
Editing a team member
- Go to Main menu > Settings > Users & Permissions.
- Find the user in the list and click Actions > Edit roles & permissions.
- Update their phone number or toggle role permissions as needed.
- Click Save.
Disabling and re-enabling users
To revoke a team member’s access, click Actions > Disable user on their row. Disabled users are moved to the Inactive tab and are immediately logged out of all devices.
To restore access, switch to the Inactive tab, find the user, and click Actions > Activate user.
For more details, see How to disable a user?
Related Articles
- Managing Your Account: Profile & Security — edit your own profile, change your password, and manage sessions.