Managing Tour Page Sections
Tour detail pages are built from sections — Overview, Photo Gallery, Itinerary, Dates and Rates, and more. You control which sections are visible, how they’re displayed, and their order on the page.
Accessing Page Sections
- Go to Website > Pages and click Tour Details Page.
- The Page Sections panel appears on the right side of the page.
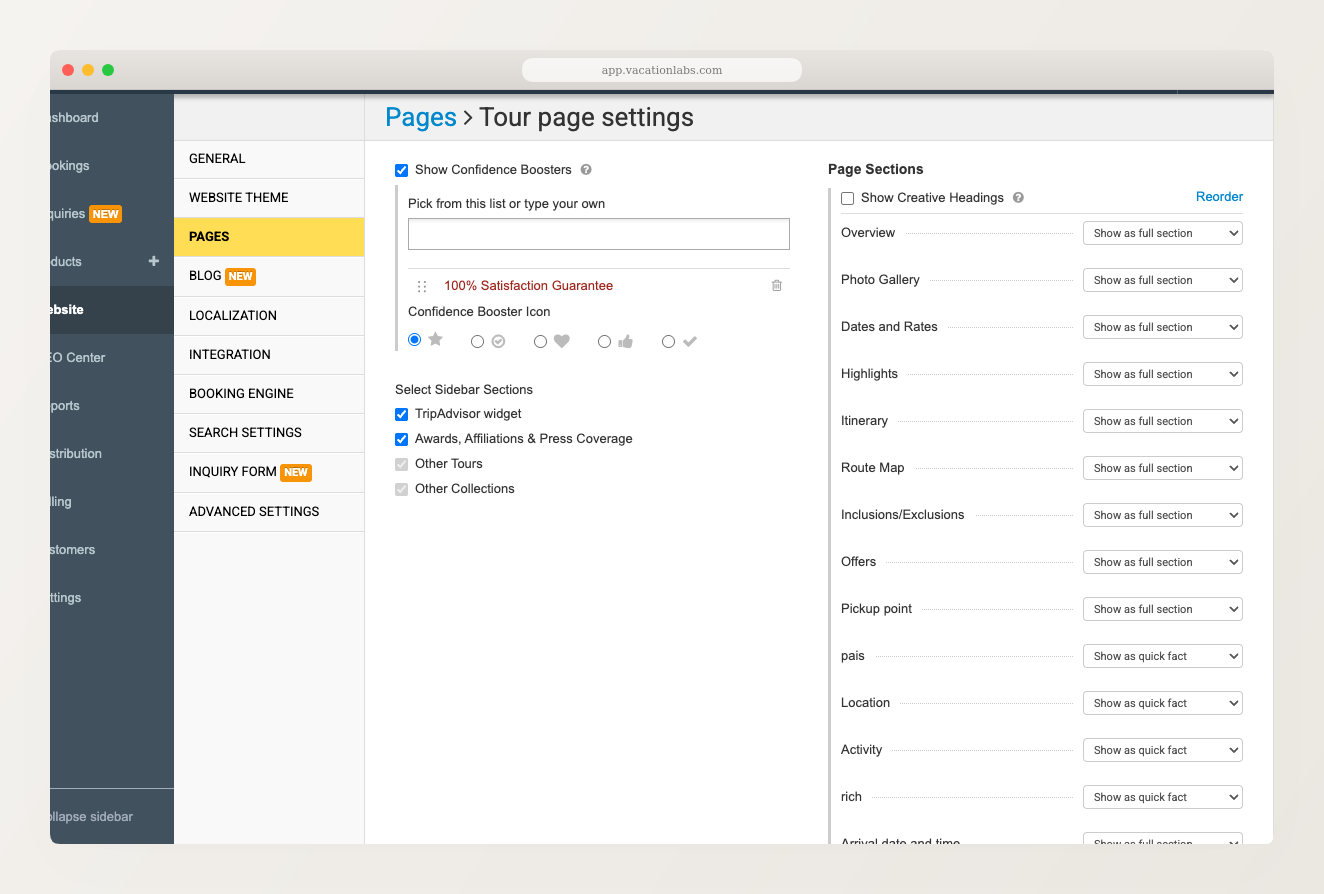
Each section has a dropdown that controls how it appears on the tour page.
Display Modes
Each section can be set to one of three display modes:
- Show as full section — the section gets its own dedicated area on the tour page with a heading and full content.
- Show as quick fact — the section appears as a compact line in the quick-facts bar near the top of the page. Best for short, single-value fields like Location or Activity type.
- Hide — the section is not shown on the tour page.
Built-in sections (like Overview, Itinerary, Dates and Rates) only support Show as full section or Hide. The Show as quick fact option is available for custom sections that you’ve created.
Reordering Sections
Click the Reorder link at the top-right of the Page Sections panel. You can then drag sections into your preferred order. Click Save when done.
The section order you set here applies to all tour detail pages on your website.
Available Section Types
Common built-in sections include:
| Section | Description |
|---|---|
| Overview | Tour description and summary |
| Photo Gallery | Swipeable image carousel (learn more) |
| Dates and Rates | Upcoming departure dates with pricing |
| Highlights | Key tour highlights |
| Itinerary | Day-by-day itinerary |
| Route Map | Map showing the tour route |
| Inclusions/Exclusions | What’s included and excluded |
| Offers | Active offers and discounts |
| Pickup point | Pickup location details |
Your account may also show custom sections that you’ve created — these appear alongside the built-in ones and support all three display modes.
Related Articles
- Tour Page Photo Gallery — enabling the photo gallery section
- How to manage themes on website — tour card styles and page design