Uploading Logo and Favicon on the Website
Overview
Personalize your website by adding your company logo and favicon. Your logo appears in the website header, while your favicon is the small icon shown in browser tabs, bookmarks, Google Search results, and mobile home screens.
Uploading Your Logo
-
Go to Website > General in the backoffice.
-
Click on the Logo upload area and select your logo file.
-
Click Save.
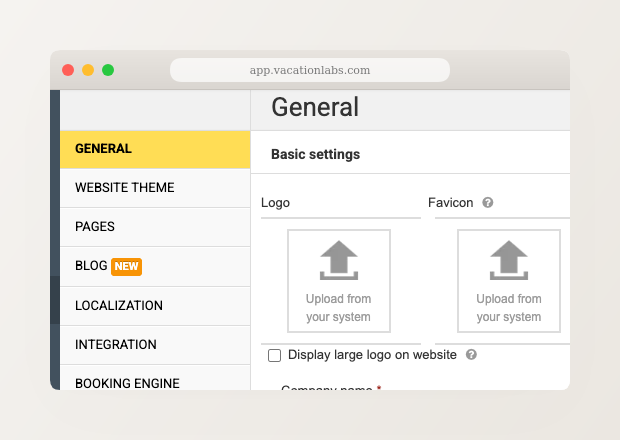
Horizontal logos work well with most website header designs. If your logo is vertical or square, check the “Display large logo on website” option to ensure it displays at a readable size.
Uploading Your Favicon
Your favicon is the small icon that represents your brand in browser tabs, bookmarks, and search results. Upload a high-resolution image and the platform takes care of the rest.
- Go to Website > General in the backoffice.
- Click on the Favicon upload area (next to the logo section).
- Select a square PNG image, ideally at least 192×192 pixels.
- Click Save.
Once you upload your favicon, the platform automatically generates all the required sizes — for browser tabs, Google Search results, and mobile home screen icons. You don’t need to use external tools or upload multiple files. A site.webmanifest is also generated automatically for mobile devices.
If your uploaded image is too small or not square, you’ll see a warning in the admin UI. For best results across all devices, upload a square PNG that is at least 192×192 pixels. Images smaller than 48×48 pixels won’t display properly in Google Search results.
Troubleshooting
- Favicon not showing in your browser? Try clearing your browser cache (Ctrl+F5 on Windows, Cmd+Shift+R on Mac).
- Favicon not appearing in Google Search? Google re-indexes favicons when it crawls your home page. This can take a few days or longer. You can speed it up by requesting indexing of your home page in Google Search Console.