Managing Website Sections
Overview
Sections are the building blocks of your website pages. Each section is a self-contained content block — a banner slideshow, a carousel of tour cards, a testimonial strip, a contact form, and more. You build pages by adding sections, arranging them in the order you want, and customizing each one.
Sections are available on static pages (Homepage, About, Contact, landing pages), collection pages using the section-based layout, and blog posts (via the Content Sections tab in the blog editor). Tour pages have their own fixed layout — see Understanding Your Website Pages for details.
The instructions below cover section management on static pages — the most common case. Collection pages and blog posts have a similar workflow with some differences — see Sections on collection pages and Sections on blog posts at the end of this article.
Adding a section
-
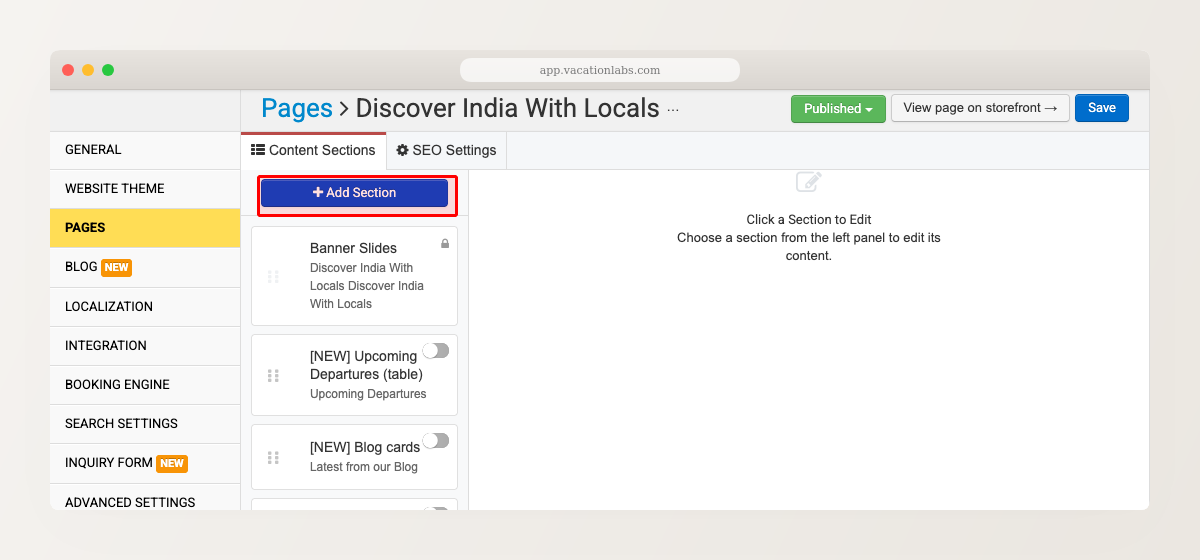
Go to Website > Pages and click the page you want to edit.
-
Click + Add Section.
-
Choose a section type from the dropdown.
-
The section is added to the page in a disabled state — it won’t appear on your live site yet.
-
Click the toggle to enable it, then click the section to open its settings.
-
Click Save.
You can add multiple sections of the same type. For example, two Tour Cards sections — one for “Adventure Tours” and another for “Family Tours” — on the same page.
Reordering sections
Drag and drop sections to change their order on the page. The order you see in the backoffice is the order visitors see on your website.
Enabling and disabling sections
Each section has a toggle next to it:
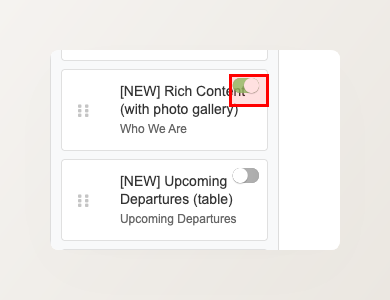
- Green = enabled and visible on your website
- Grey = disabled and hidden from visitors
Disabling a section does not delete its content. You can re-enable it at any time and everything will be exactly as you left it. This is useful for seasonal content — disable a “Winter Specials” banner in summer and re-enable it later without rebuilding it.
Deleting a section
To permanently remove a section:
- Click the section to open its editor.
- Click the red Delete Section button at the bottom of the editor panel.
- Confirm the deletion.
Deleting a section is permanent — all content and settings in that section are lost. If you just want to temporarily hide a section, disable it using the toggle instead.
Common section settings
Most sections share a set of appearance settings you can use to control how the section looks on your page:
- Background Colour — choose from preset color swatches or pick a custom color
- Background Image — use an image as the section background
- Text Colour — override the default text color (useful when using a dark background)
- Section title — an optional title displayed above the section content
These settings are found in each section’s editing panel alongside the section-specific options.
Section types
Here’s every section type you can add to a page. Click through for detailed setup guides.
| Section type | What it does |
|---|---|
| Banner Slides | Full-width slideshow with images, text overlays, and call-to-action buttons. Supports tour banners, collection banners, custom banners, and autoplay video. |
| Tour Cards | Carousel of tour/product cards. Each card shows the tour image, name, price, and a link to the tour page. |
| Collection Cards | Carousel of collection cards linking to your collection pages (destinations, activity types, etc). |
| Testimonials | Customer reviews displayed as a carousel or grid. |
| Upcoming Departures | Table of upcoming trip departures with dates, prices, availability, and Book Now buttons. |
| Blog Cards | Carousel of recent blog posts from your blog. |
| Rich Content | Free-form text and images using the rich text editor (RTE). Includes an optional photo gallery carousel. |
| Logo Strip | Row of logos — for partners, accreditations, certifications, or “As seen in” branding. |
| Inquiry Form | Inline or modal inquiry form on any page. Captures visitor details and sends them to your backoffice. |
| Contact Form | Contact form with name, email, phone, and message fields. |
| Custom HTML | Raw HTML block for embedding third-party widgets, custom scripts, or any content not covered by other section types. |
Not all section types are available on all page types. Static pages support every type listed above. Collection pages (section-based layout) support all types plus a mandatory Tour Collection Listing section. Blog posts support Rich Content, Tour Cards, Collection Cards, Logo Strip, and Inquiry Form (but not Banner Slides). See Understanding Your Website Pages for the full breakdown.
Sections on collection pages
Collection pages that use the section-based layout support the same section types as static pages. You manage them from Products > Collections — edit the collection to add, reorder, and customize sections.
The key difference: a Tour Collection Listing section is always present and cannot be removed. It’s the core tour listing for that collection. You can reorder it (e.g., place a banner above it and testimonials below), but you can’t delete it.
To switch a collection page to the section-based layout, go to Products > Collections, edit the collection, and click Switch to section-based layout.
See Creating and managing collections for more details.
Sections on blog posts
Blog posts support sections via the Content Sections tab in the blog post editor (Website > Blog > edit a post). You can add, reorder, enable, and delete sections the same way as on static pages.
The available section types are more limited — blog posts support Rich Content, Tour Cards, Collection Cards, Logo Strip, and Inquiry Form. Banner Slides are not available; the featured image serves as the visual header instead.
See Creating and Managing Blog Posts for more details.
Related Articles
- Understanding Your Website Pages — page types and what you can customize on each
- Adding/Modifying Pages on the Website
- Creating and managing collections
- Banner Images and Focus Points