Send a message to everyone on a departure
Overview
Sometimes you need to reach everyone on a particular departure at once — a last-minute change of meeting point, joining instructions the evening before, or a link to the trip’s WhatsApp group. The departure’s Send Message sidebar does exactly that: one email or WhatsApp message, sent to all the relevant customers on that departure, personalised per recipient with merge fields.
This is the departure-wide companion to emailing a single booking or inquiry — same idea, but scoped to one departure’s participants.
Opening the Send Message sidebar
- Go to Products → Trips, open the trip, and open the departure you want to message. (You can also get there from any booking via View departure.)
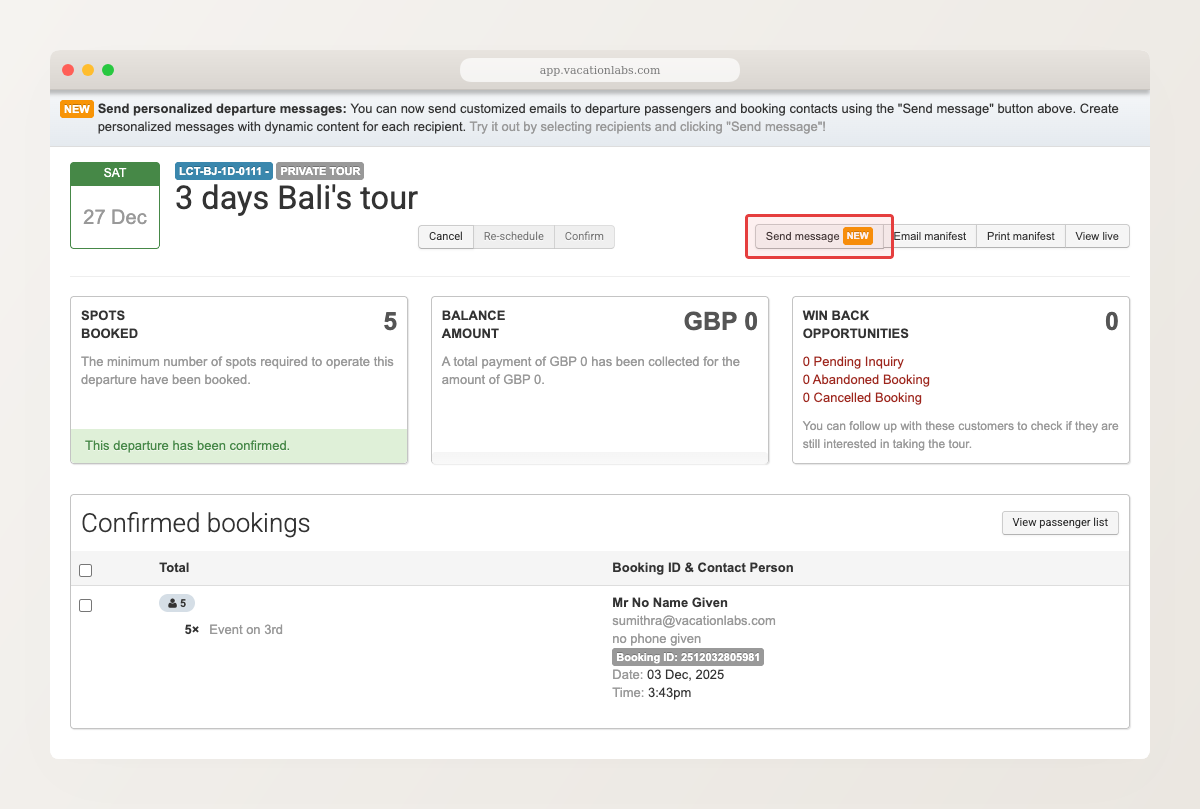
- Click Send message. The sidebar opens with an Email tab and a WhatsApp tab.
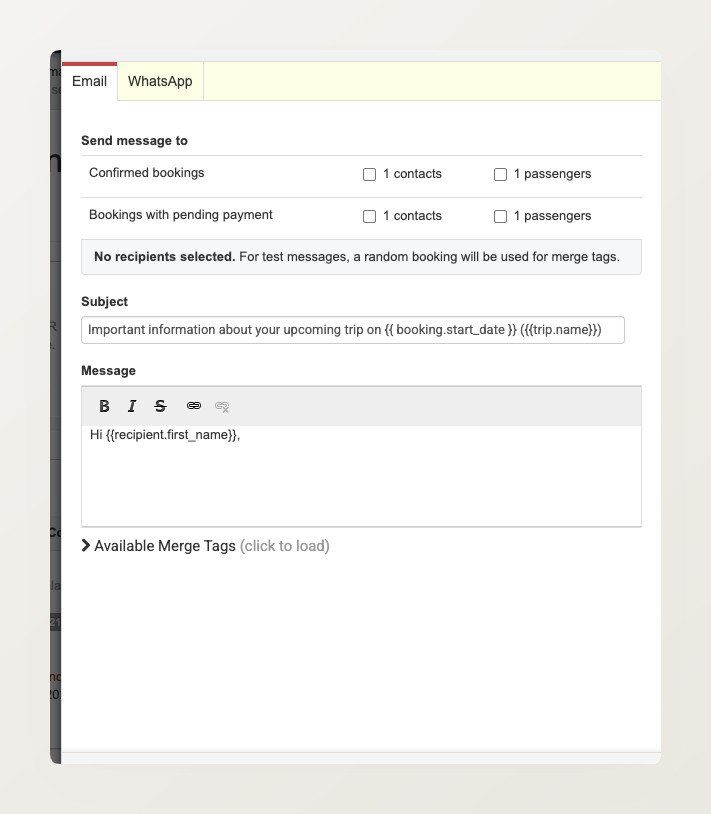
Choosing who receives it
Under Send message to, pick the recipients by booking status and type:
- Confirmed bookings — the contacts (one per booking) or every passenger
- Bookings with pending payment — their contacts or every passenger
Tick any combination — for example, Confirmed bookings → passengers to reach everyone travelling, or Bookings with pending payment → contacts to nudge those who still owe.
With no recipients selected, a test send still works — it uses a random booking from the departure to fill in the merge fields, so you can preview the message before choosing who gets it.
Writing the message
- Choose the Email or WhatsApp tab.
- Email: write a Subject and Message. Both support merge fields (for example
{{recipient.first_name}}and{{trip.name}}) that fill in per recipient. Click Available Merge Tags to see the full list. - WhatsApp Add-on Available as a paid add-on. : pick a pre-approved WhatsApp template. This needs a connected provider — see WhatsApp notifications.
- To preview, enter an address in the test field and click Send Test.
- When you’re ready, click Send.
Only customers with the relevant detail on file are reached — an email needs an email address, and a WhatsApp message needs a phone number.