Managing Photos and Videos in the Media Library
Overview
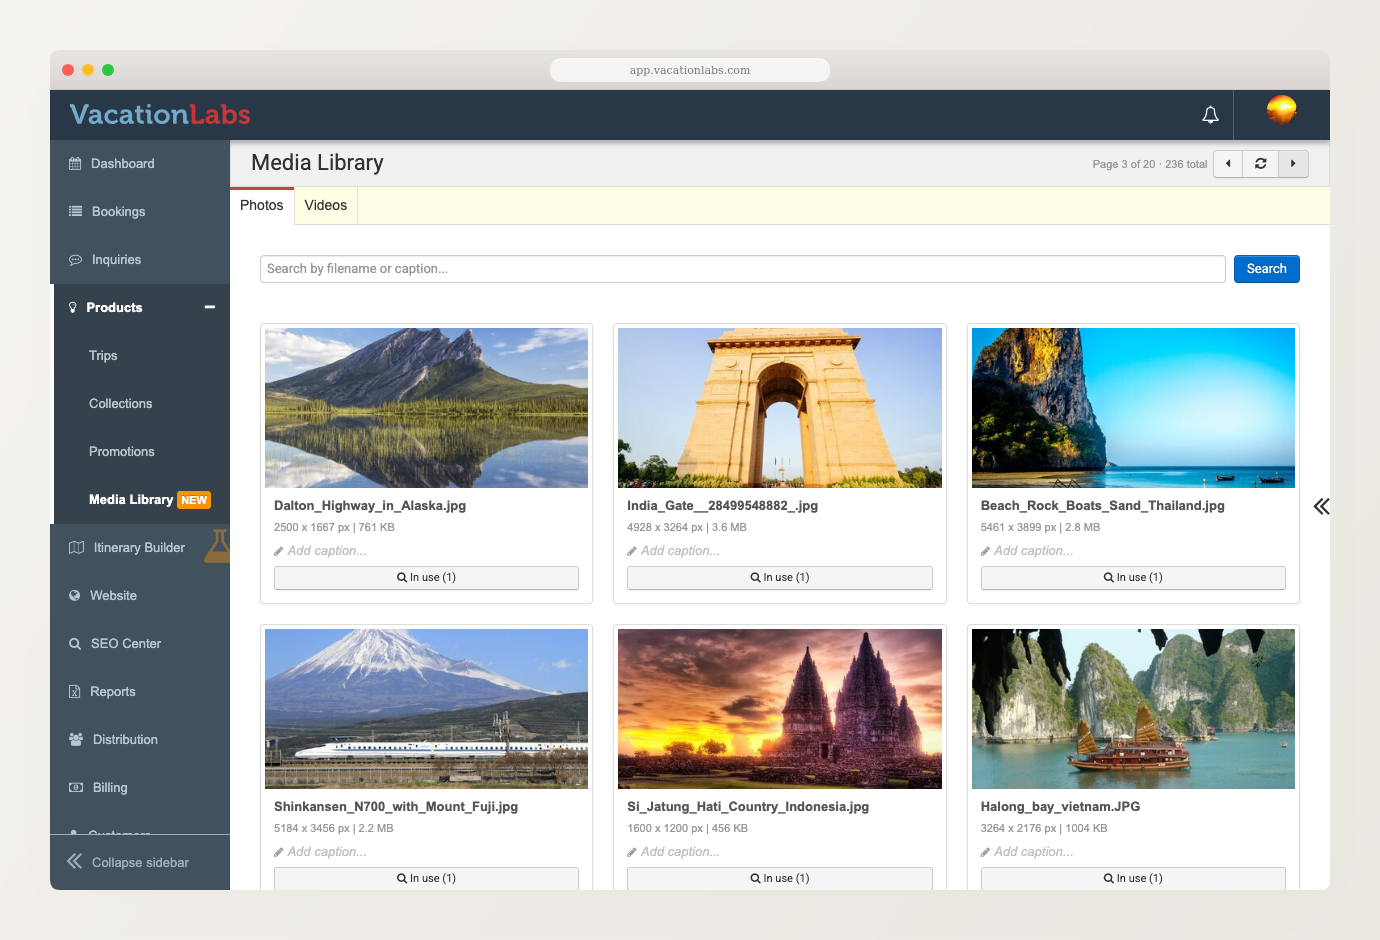
The Media Library is a single place to browse and manage every photo and video on your website. Open it from Products → Media Library in the backoffice.
It has two tabs — Photos and Videos — each showing your media in a grid, newest first. From here you can search your media, edit a photo’s caption or a video’s title, see exactly where each item is used, and remove items you no longer need.
The Media Library is for browsing and managing media that’s already on your site. You add new photos and videos where you use them — on a tour, in a page section, or in the rich text editor — using the media picker. See Add or change photos on a tour.
Browsing and searching
Switch between the Photos and Videos tabs to see each kind of media. Each tab is paginated, with the most recently added items first — the header shows the current page and the total count.
To find a specific item, type into the search box at the top:
- On the Photos tab, search matches a photo’s filename or caption.
- On the Videos tab, search matches a video’s title.
Editing captions and video details
You can edit a photo’s caption directly on its card — click Add caption (or the existing caption), type, and the change saves automatically.
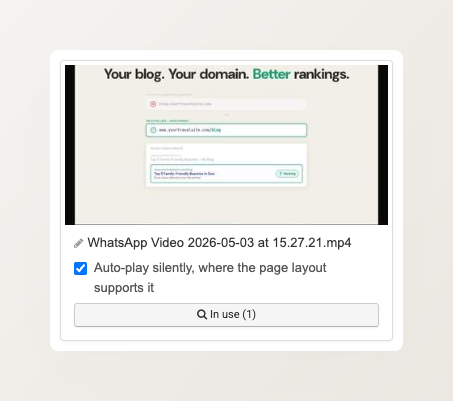
Videos have a few more details you can set on the card:
- Title — click to edit inline; this is how you identify and search for the video.
- Change thumbnail — replace the still image shown before the video plays.
- Auto-play silently — when enabled, the video plays on its own (without sound) wherever the page layout supports it.
Seeing where a photo or video is used
Every item shows a usage count, so you always know whether it’s in use. Click In use (N) on any card to open a list of exactly where that photo or video appears — the specific tours and pages that reference it.
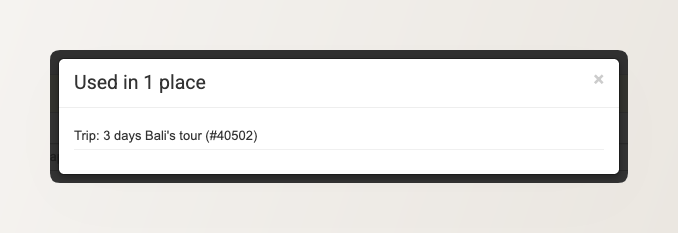
This makes it safe to tidy up your media: you can check what depends on an item before changing or removing it.
Removing media you no longer need
A Delete option appears only on items that aren’t used anywhere — if a photo or video is in use, you’ll see In use (N) instead, and it can’t be deleted. To delete an unused item, press and hold the Delete control rather than clicking once, which prevents accidental removal.
You can’t delete a photo or video that’s still in use anywhere on your site — remove it from those places first. Images uploaded inside the rich text editor are also protected, so they’re never removed by mistake.
Reusing existing media
Wherever you add media — a tour’s photos, a page section, or a banner — the picker opens with Photos and Videos tabs and a From Library view. Instead of uploading the same file again, switch to the library view and pick an item you’ve already added. Use the search box to find a specific photo or video by name.
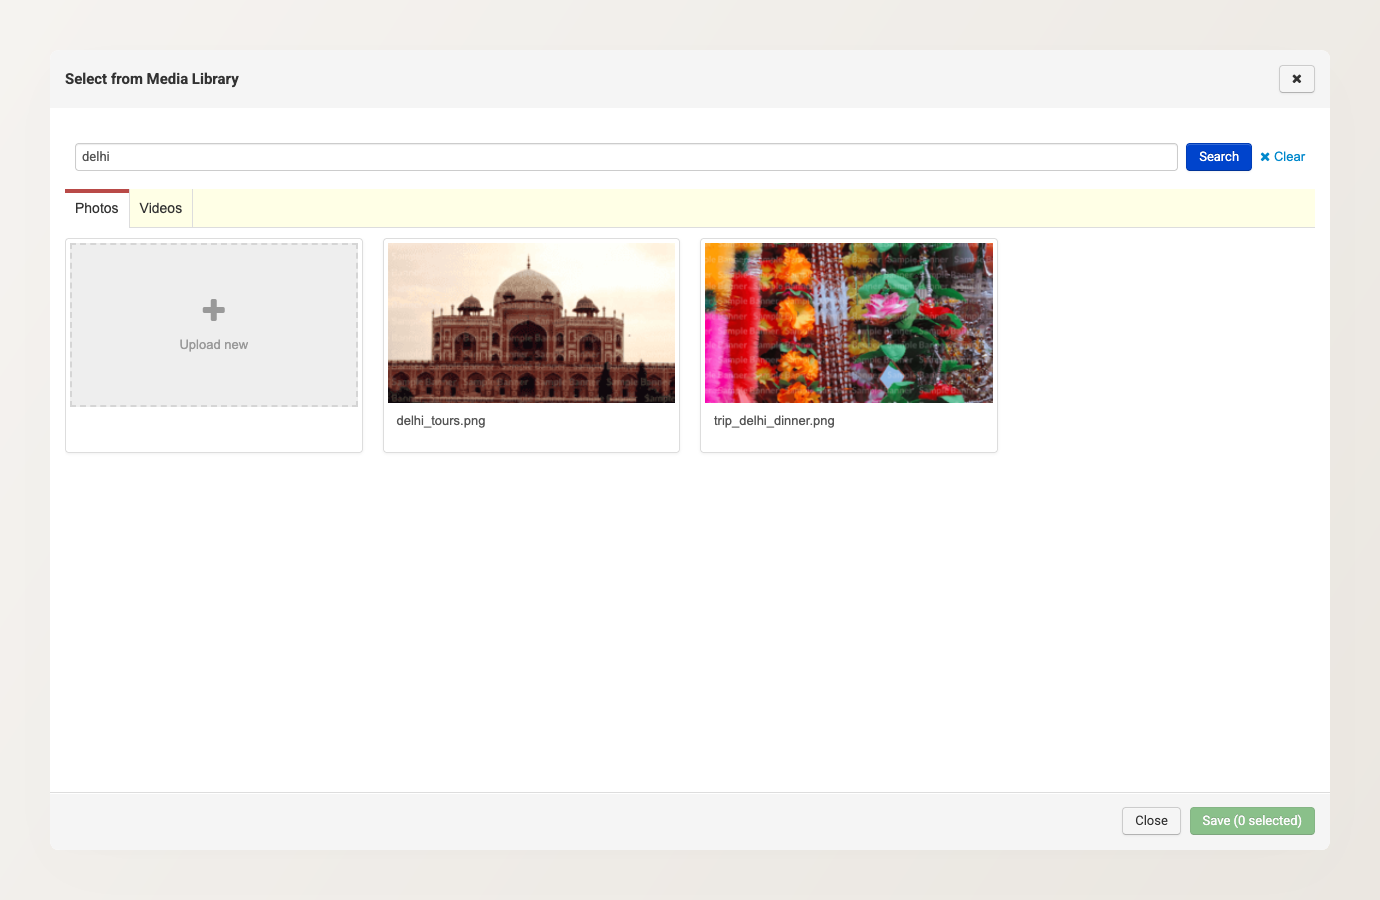
Because photos and videos are shared rather than copied, cloning a tour reuses the original’s media instead of duplicating every file. This keeps cloning fast even for tours with a large photo gallery.