Upload images directly in the rich text editor
Adding images to your website content just got a lot easier. You can now upload images directly from the rich text editor — no more switching between tabs, copying URLs, or using external image hosting services.
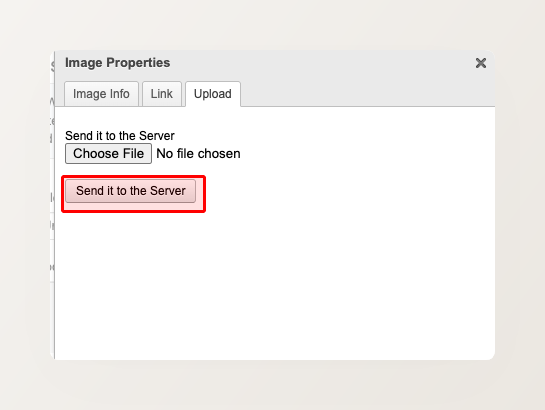
Previously, inserting an image into a content area (like a tour itinerary, blog post, or rich content section) required a multi-step workaround: upload the image to your tour’s photo gallery or an external service, copy the image URL, then paste it into the editor. Several customers reached out asking for a simpler way, and we’re happy to deliver.
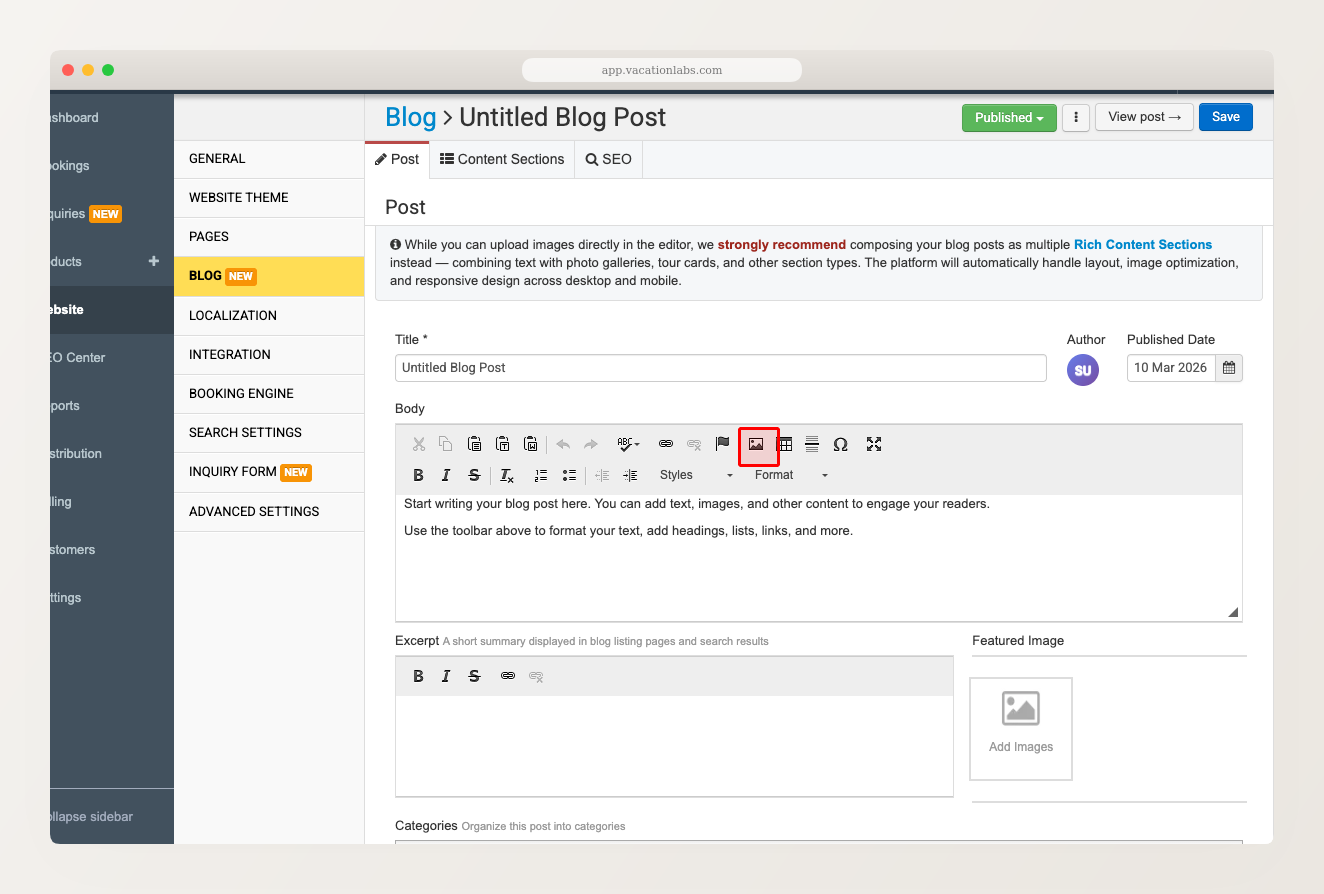
Now, just click the Image button in the editor toolbar, switch to the Upload tab, choose your file, and hit Send it to the Server. The image is uploaded and inserted in one step — right where your cursor is. You can set alignment (left, right, or center) and alt text before inserting.
This works everywhere the rich text editor appears — blog posts, rich content sections, itinerary descriptions, and static page content areas. It supports JPEG, PNG, and WebP formats.
