
Assigning Inquiries to Your Team
Looking to route inquiries automatically? This article covers assigning by hand. You can also auto-assign new inquiries with a plain-English rule that round-robins within a team or picks an owner from the trip or the customer’s location — and limit what each salesperson sees. See Automatic Inquiry Assignment (Round-Robin) and Staff Visibility.
Overview
When your team handles inquiries together, you need to know who is following up on which lead. Inquiry assignment lets you assign any inquiry to a specific team member, so nothing falls through the cracks and everyone knows their responsibilities.
Assigning an inquiry
-
In the inquiry list, find the inquiry you want to assign.
-
Click the assignee indicator (a colored circle with initials) on the inquiry row.
-
A searchable dropdown appears with your team members. Type to filter by name.
-
Click a team member to assign them.
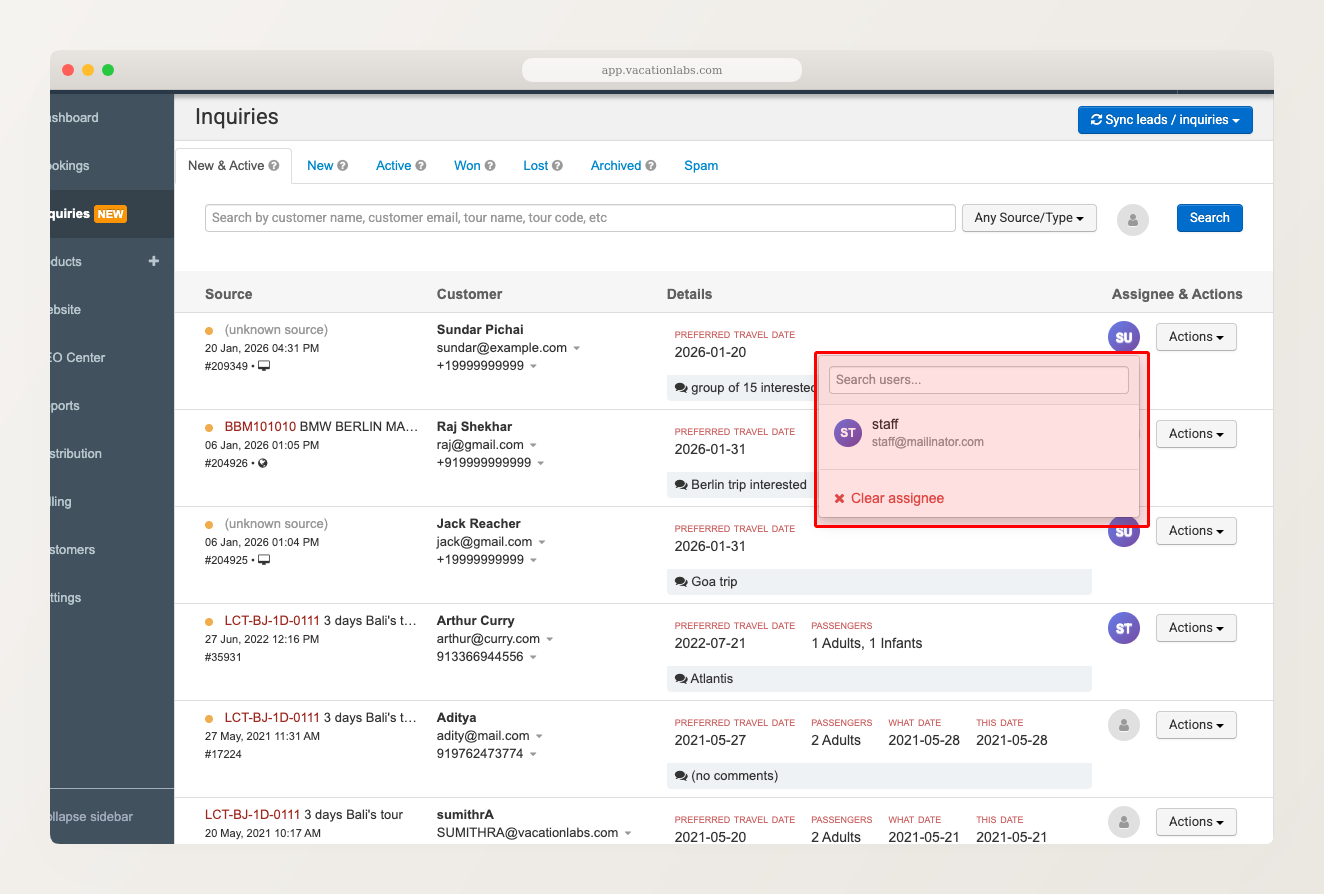
The assigned team member’s initials appear on the inquiry row, so you can see assignments at a glance when scanning the list.
Unassigning an inquiry
To remove an assignment, click the assignee indicator again and click the Clear assignee link at the bottom of the dropdown. To reassign, simply select a different team member.
Who appears in the dropdown
The dropdown shows team members who have inquiry management permissions on your account. If a team member doesn’t appear in the list, ask your account administrator to check their user permissions.
Establish a routine: have a team lead review the New & Active tab each morning and assign any unassigned inquiries. This prevents leads from sitting untouched.
Related Articles
- Automatic Inquiry Assignment and Staff Visibility — route new leads automatically and control who sees what
- Managing Inquiries — overview of the inquiry system
- Viewing, Searching, and Managing Inquiry Status — search and organize your inquiries