
Bulk Importing Inquiries from a CSV File
Overview
When leads/inquiries arrive in bulk — say, from a spreadsheet from a WhatsApp marketing tool, an Instagram export, an ad-platform download, or a list your team kept by hand — you can import them into your Vacation Labs account in bulk. The import runs step by step: it reads your file, lets you line up each column with the right inquiry field, and shows you a preview before anything is saved.
Bulk import is one of several ways inquiries reach your list. For a single inquiry, use Creating Inquiries Manually; for a live Facebook and Instagram connection, use Importing Meta Ad Leads.
Before you start
Export your inquiries to a CSV file (most spreadsheets and lead tools offer “Export as CSV”). Aim for:
- One row per inquiry.
- One column per detail — typically the customer’s name, phone, and email, plus travel date, number of passengers, any comment, the trip they asked about, and where the inquiry came from.
Your columns do not need specific names or a fixed order. You line each one up with an inquiry field during the import, so a spreadsheet exported from any tool will work.
The import runs in five short steps: Upload > Column Mapping > Trip Mapping > Assignee Mapping > Preview. You confirm each step, and nothing is saved until the very end.
Step 1: Upload your CSV
-
Go to Main menu > Inquiries.
-
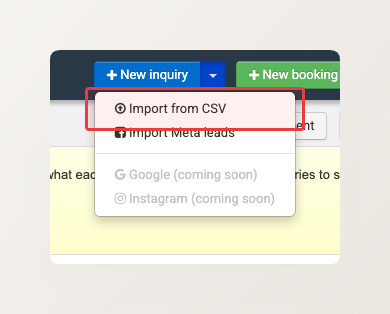
Click the dropdown arrow on New inquiry, then choose Import from CSV.
-
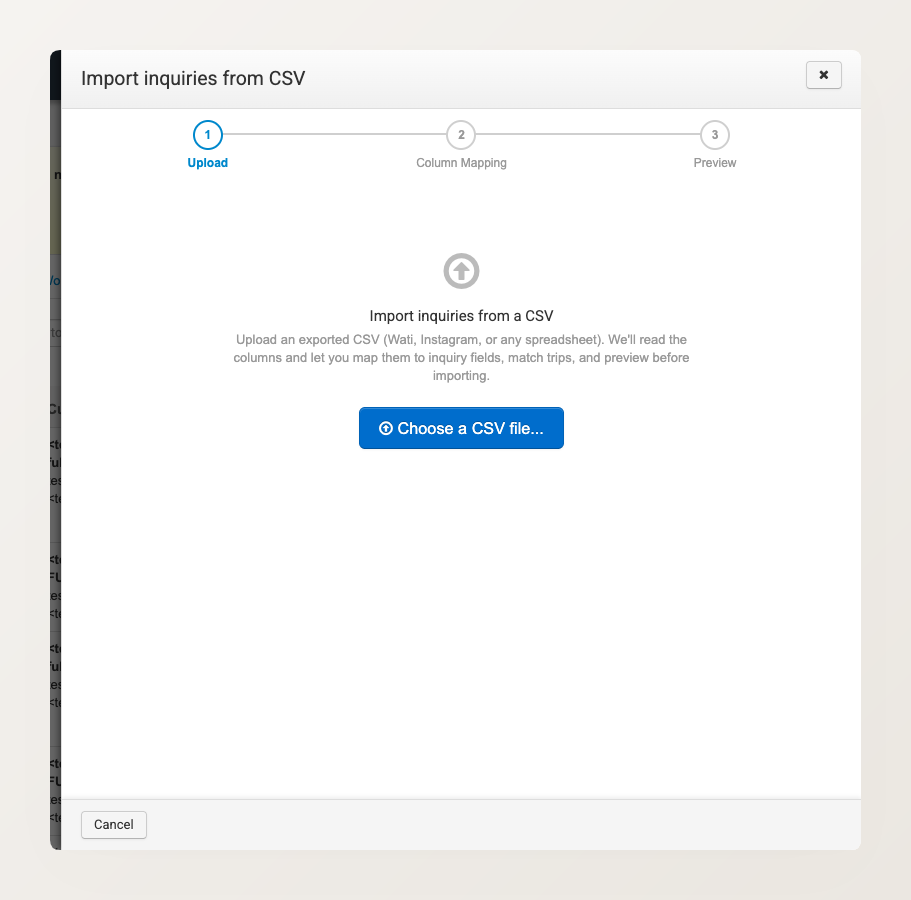
Click Choose a CSV file and select your file.
Step 2: Map your columns
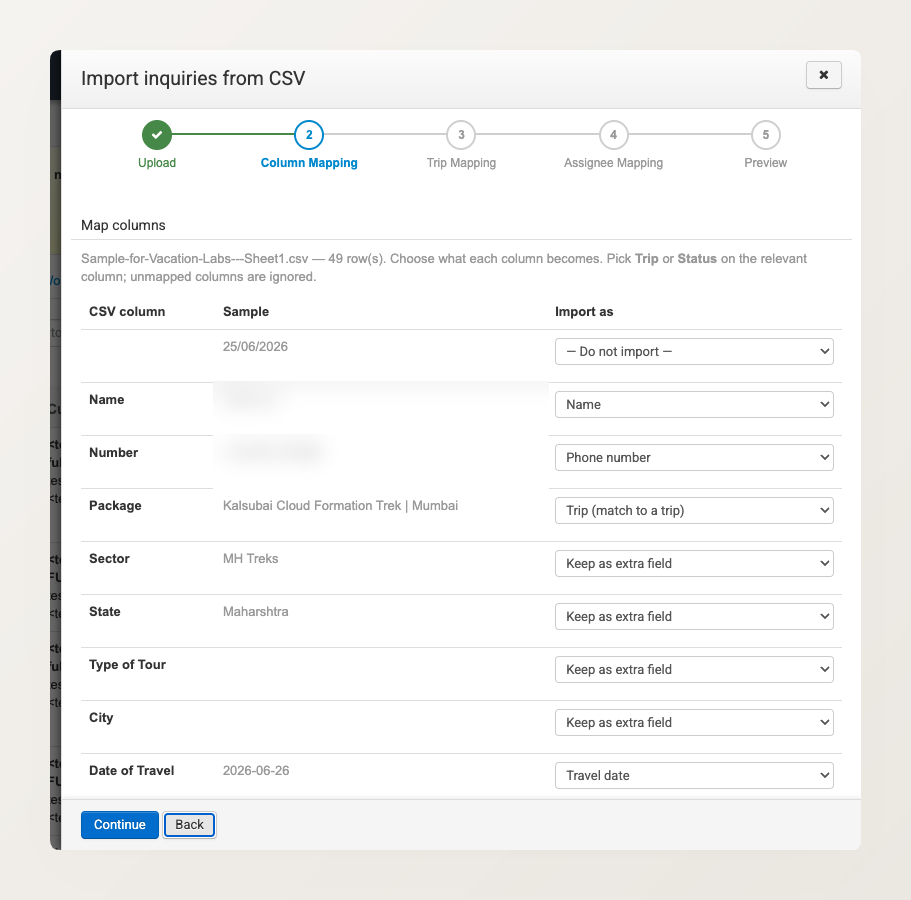
This step lists every column from your spreadsheet with a sample value, and lets you choose what each column becomes — Name, Phone number, Travel date, and so on. It makes a best guess for each — so please correct any guesses it gets wrong.
A few choices are worth knowing:
- Trip (match to a trip) — mark the column that holds the trip or package name. The trip names get matched to your trips in the next step.
- Status — mark a column that holds an inquiry status if your file has one.
- Keep as extra field — keeps a column you want to preserve (for example a “Sector” or “City” note) attached to the inquiry, even though it is not a standard field.
- Do not import — ignores a column entirely. Unmapped columns are ignored too.
Step 3: Confirm trips
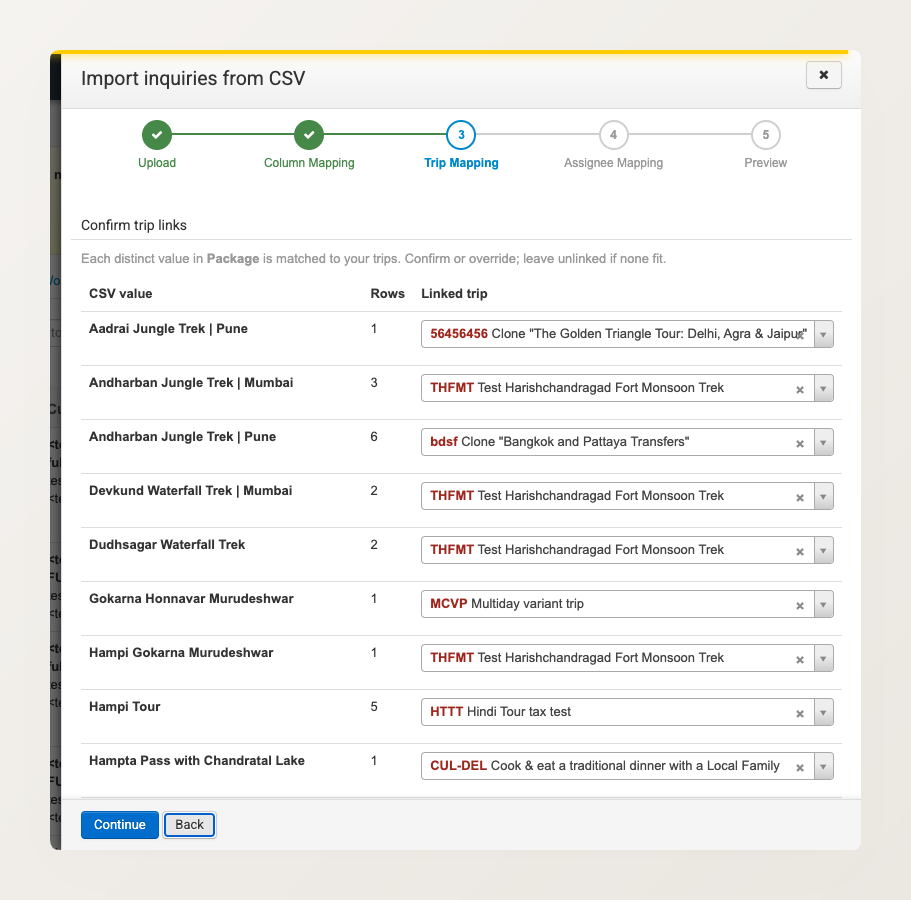
Each distinct trip name in your file is matched to one of your trips, with the number of rows it covers. Confirm each match, or pick a different trip. If none fit, you can unlink it by pressing the cross (×) icon next to the trip name on this step — the inquiry still imports, just without a trip attached, and you can link it later.
Step 4: Confirm owners
If you mapped a column of agent names, each name is matched to a team member. Confirm each match, pick a different person, or leave it unassigned if no one fits.
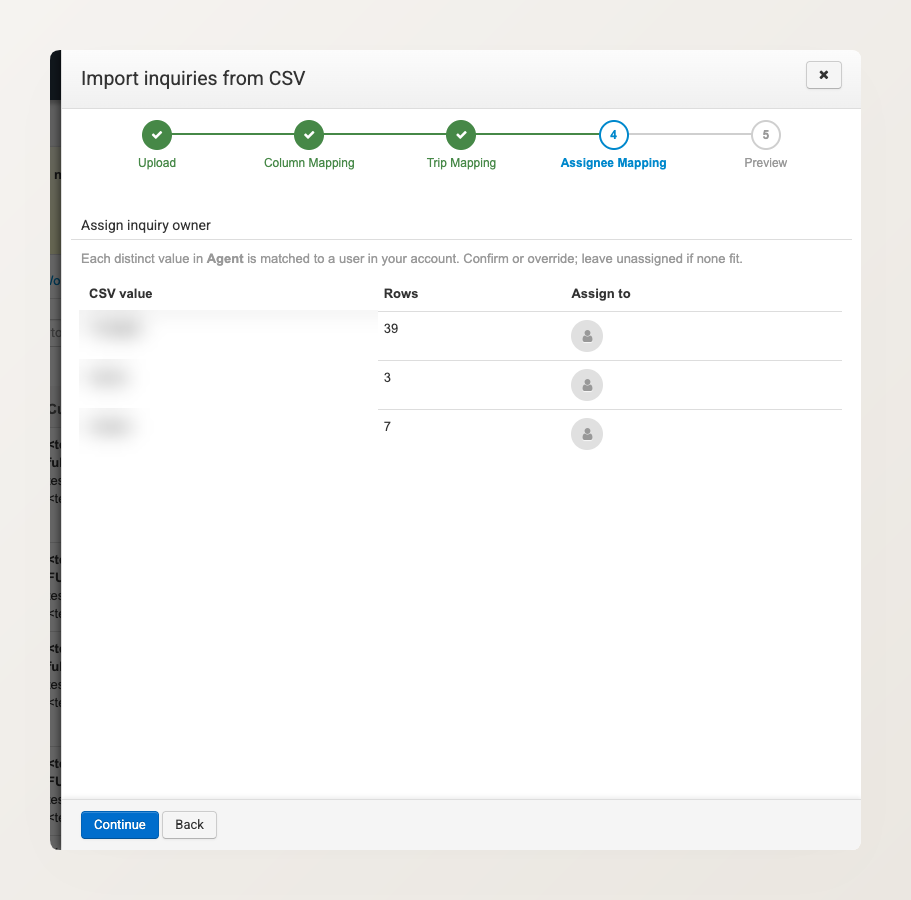
Trip and assignee matches are suggestions you confirm, not automatic. A trip name that does not match one of your trips is imported unlinked, and an agent name that matches no one is left unassigned — in both cases the inquiry still comes in, and you can fix it afterwards.
Step 5: Preview and import
The last step shows a preview of exactly what will be imported — each inquiry with its name, phone, matched trip, and a Ready marker — along with a count of how many rows are ready. Nothing is saved until you click the import button.
Two choices sit above the preview, both off by default:
- Send the acknowledgement email — whether each imported inquiry receives your standard inquiry acknowledgement.
- Run automation rules — whether your rules fire on the imported rows, such as automatic assignment or a configured WhatsApp message.
When the preview looks right, click Import to commit.
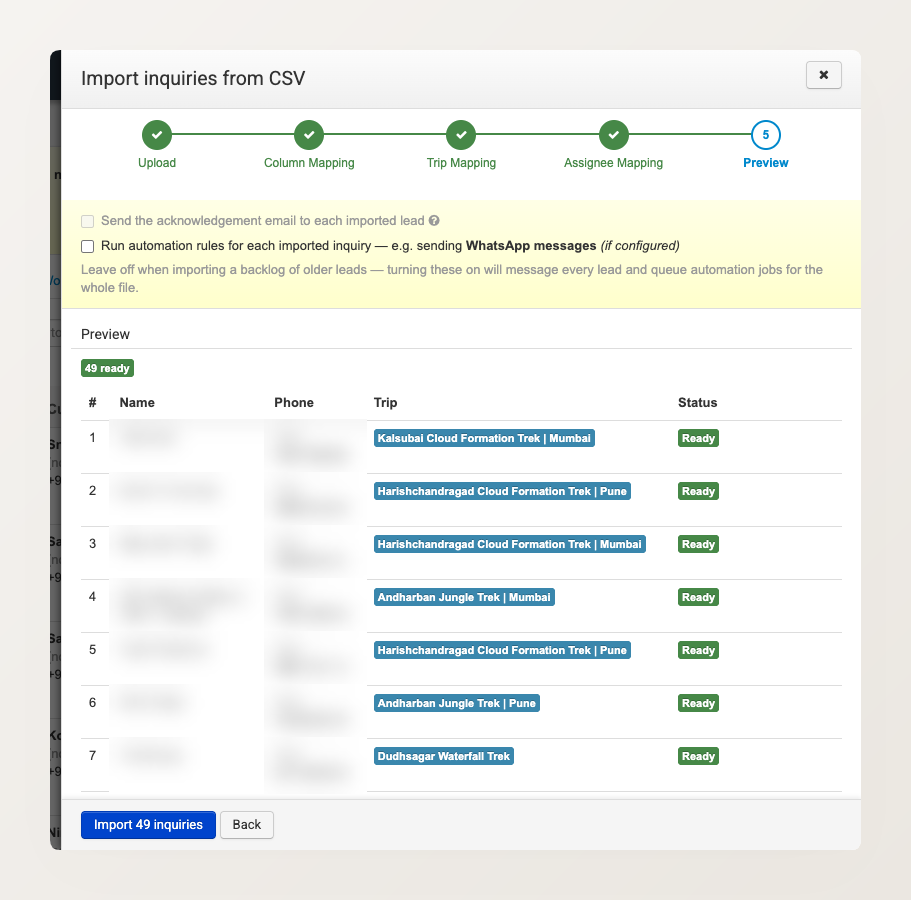
Leave both toggles off when importing a backlog of older inquiries — turning them on messages every inquiry in the file and queues automation for all of them. Turn them on only when you are importing genuinely new inquiries that should be contacted.
After importing
Imported inquiries behave exactly like any other. They appear in your inquiry list, open and edit the same way, and can be searched, assigned, and exported. If your file records where each inquiry came from, that is kept as the inquiry’s source attribution — see Where Your Bookings and Inquiries Come From.
Related Articles
- Managing Inquiries — overview of the inquiry system
- Creating Inquiries Manually — add a single inquiry by hand
- Importing Meta Ad Leads as Inquiries — a live connection to Facebook and Instagram lead ads