
Inquiry Forms on Your Website
Overview
An inquiry form lets a visitor ask you about a trip without going through a full booking. Every submission becomes an inquiry under Main menu > Inquiries, along with the page it was submitted from and the name of the form that captured it.
Forms are part of your website, so you do not need a third-party form tool such as Google Forms, Jotform, or Typeform. Inquiries land straight in your backoffice instead of a separate inbox you have to remember to check, and spam protection is already built in.
An inquiry form can appear in two places on your website. The form itself is built in the same editor either way, so you only have to learn one set of controls. See Building an Inquiry Form for the fields and settings.
Where an inquiry form can appear
| On a tour page | On any other page | |
|---|---|---|
| Best for | A visitor looking at one specific trip who wants a quote for it | Contact pages, About pages, and destination or campaign landing pages |
| Set up under | The tour’s Extra Booking Fields | The page’s Content Sections |
| Ties the inquiry to a trip | Yes | No |
| Can pop up on its own | Yes | No |
Most operators use both. A tour-page form catches someone who has already picked a trip. A form on your Contact page catches someone who has not decided yet.
Adding an inquiry form to a tour page
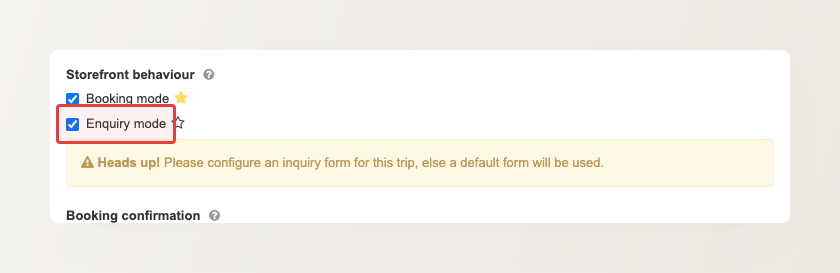
A tour shows an inquiry form once you turn on its Enquiry mode.
-
Go to Main menu > Products > Trips > [your tour] > Settings. To open a tour, click Edit on its row.
-
Under Storefront behaviour, tick Enquiry mode.
-
Click Save.
Booking mode and Enquiry mode are independent, so you can leave both on. A trip with both enabled lets a visitor either book straight away or send you an inquiry instead.
Next, choose which form the tour uses.
-
Go to Main menu > Products > Trips > [your tour] > Extra Booking Fields.
-
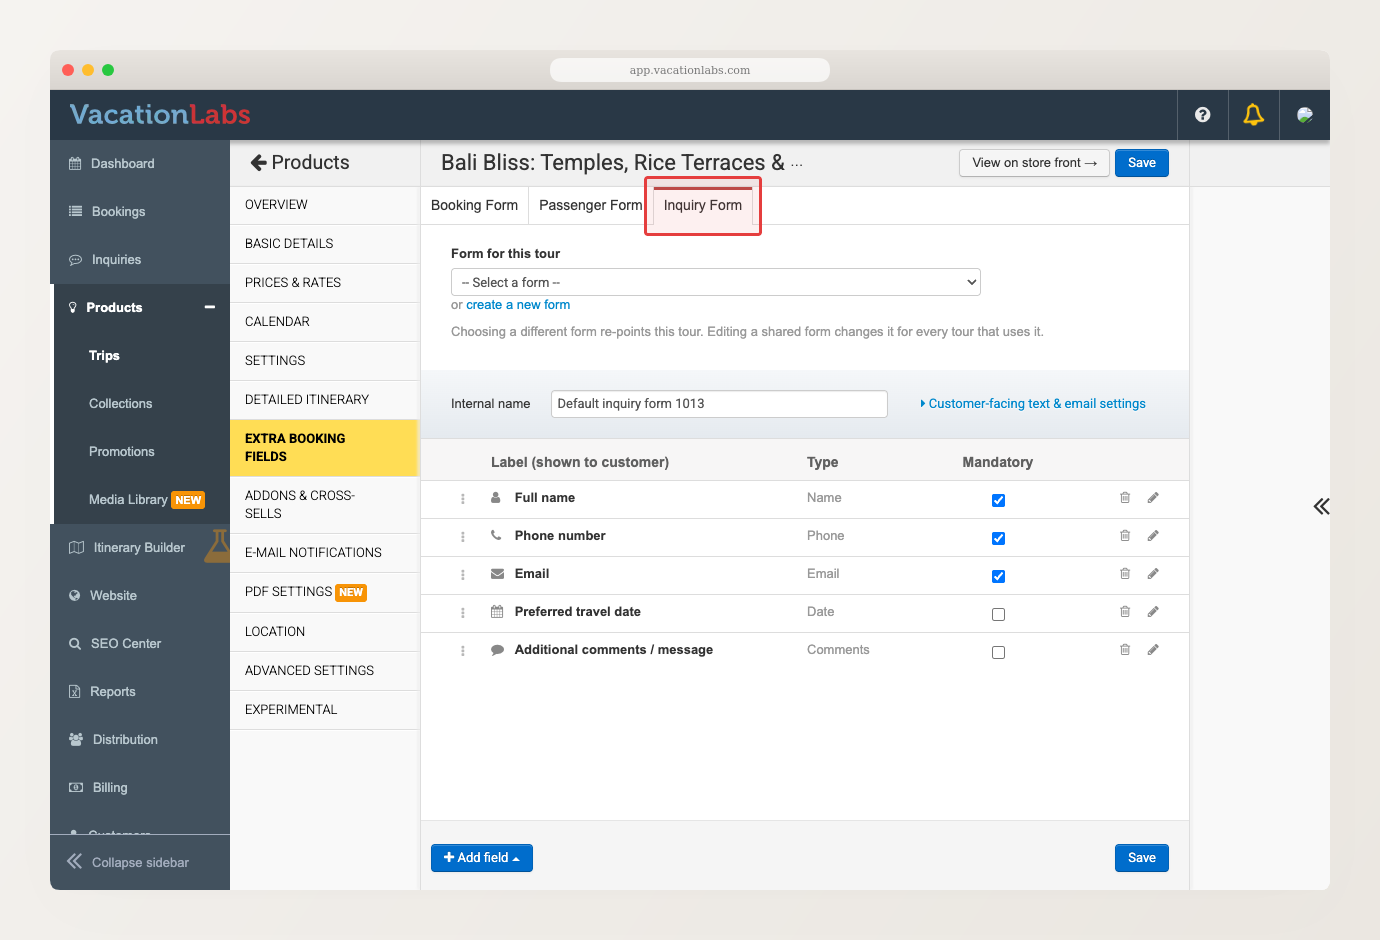
Switch to the Inquiry Form tab.
-
Pick a form from Form for this tour, or click create a new form.
-
Click Save.
If you do not choose a form, the tour falls back to your account’s default inquiry form. A new form you create here starts as a copy of that default rather than as a blank page.
One form can be shared by several tours. Editing a shared form changes it for every tour that uses it. To give one tour its own fields, create a new form for that tour instead of editing the shared one.
Adding an inquiry form to any other page
Away from tour pages, an inquiry form is added as a section. You can put one on a static page, a collection page, or a blog post — your Contact page, an About page, a destination landing page, or anywhere else a visitor might want to reach you.
-
Go to Main menu > Website > Pages, then click the page you want to edit.
-
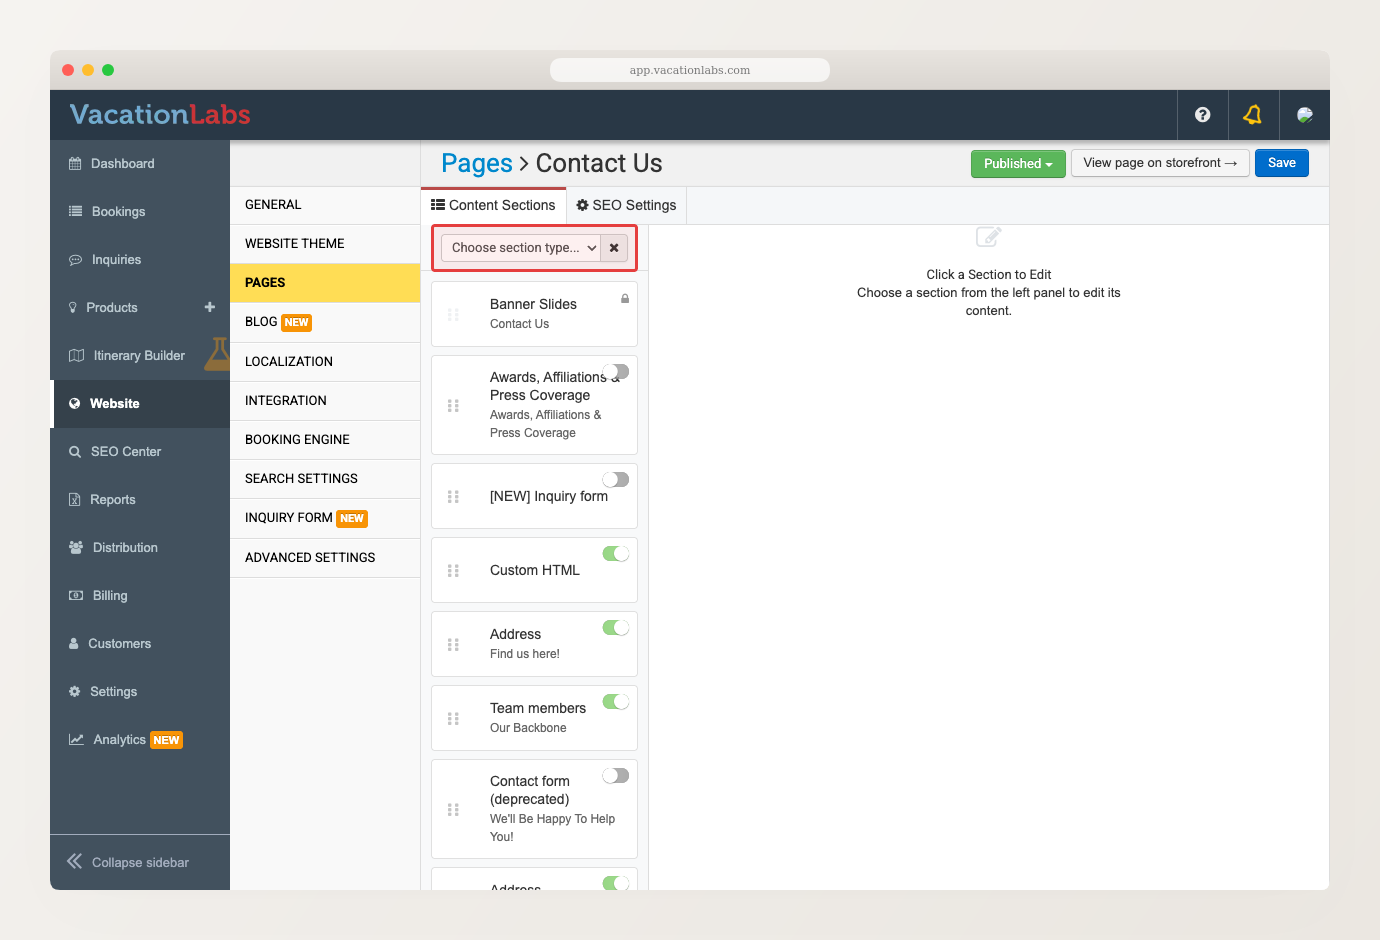
On the Content Sections tab, click + Add Section, then choose [NEW] Inquiry form from the section-type dropdown.
-
Switch the new section’s toggle on. A section stays hidden from your website until you enable it.
-
Click the section to open its settings.
-
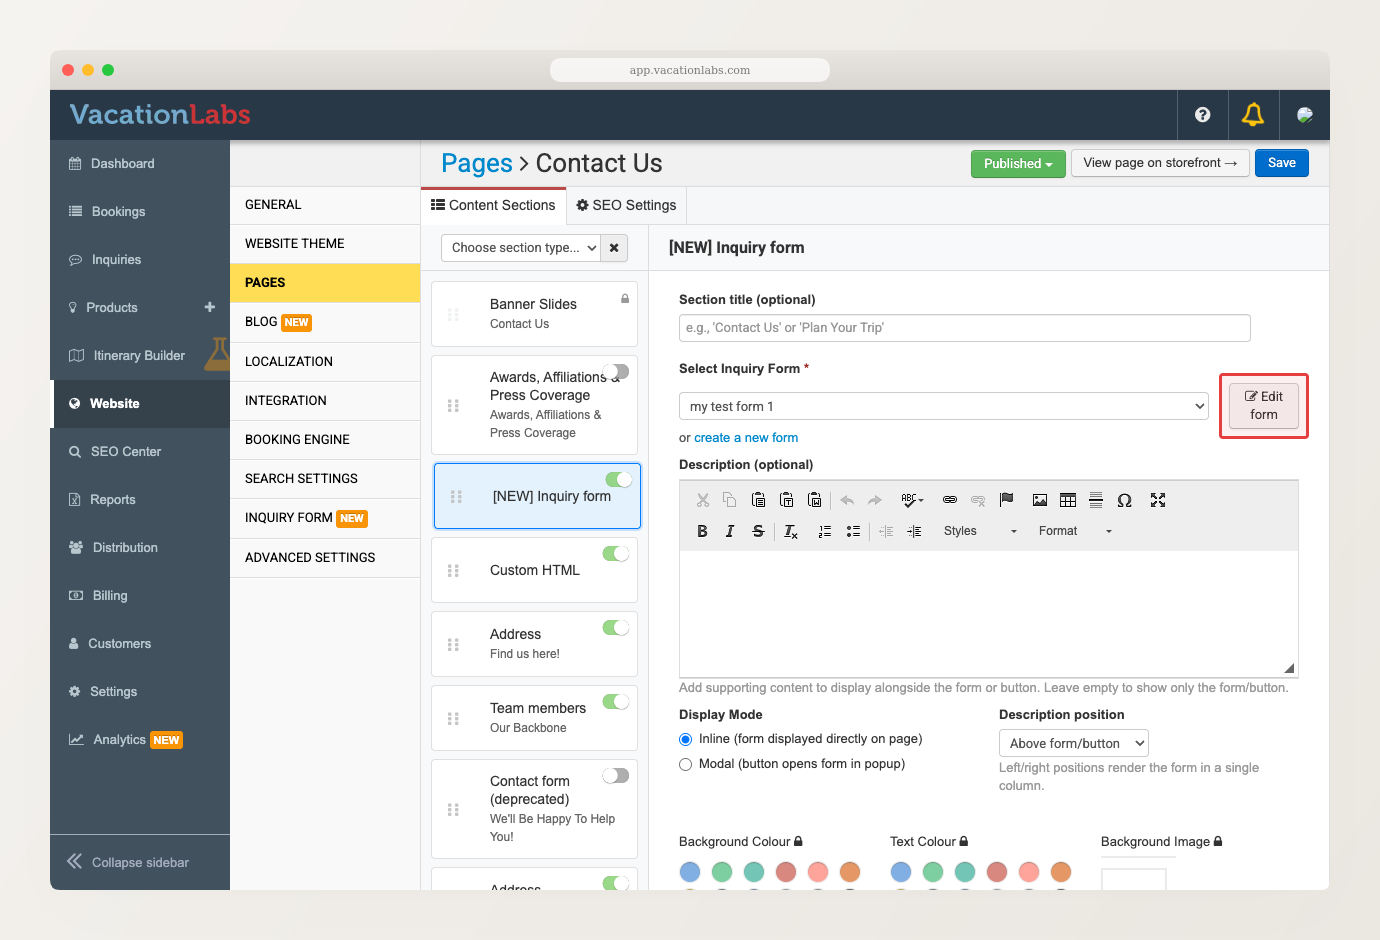
Pick a form under Select Inquiry Form, or click create a new form. To change the fields on the form you picked, click Edit form.
-
Click Save.
You can give the section a Section title, such as “Contact Us” or “Plan Your Trip”, and add a rich-text Description beside the form. Description position controls where that text sits: above, below, left, or right. The left and right positions put the description and the form in two columns, so the form drops to a single column to fit the narrower space.
You can also place more than one inquiry form section on the same page.
Showing the form inline or as a popup
Display Mode decides how a visitor reaches the form.
Inline puts the form directly in the page. A visitor sees the fields without clicking anything. Use this where the form is the point of the page, such as a Contact page.
Modal puts a button on the page instead, and the form opens in a popup when the button is clicked. Use this where you want the form available without it dominating the page. When you choose Modal, a Button text field appears so you can set the button’s wording.
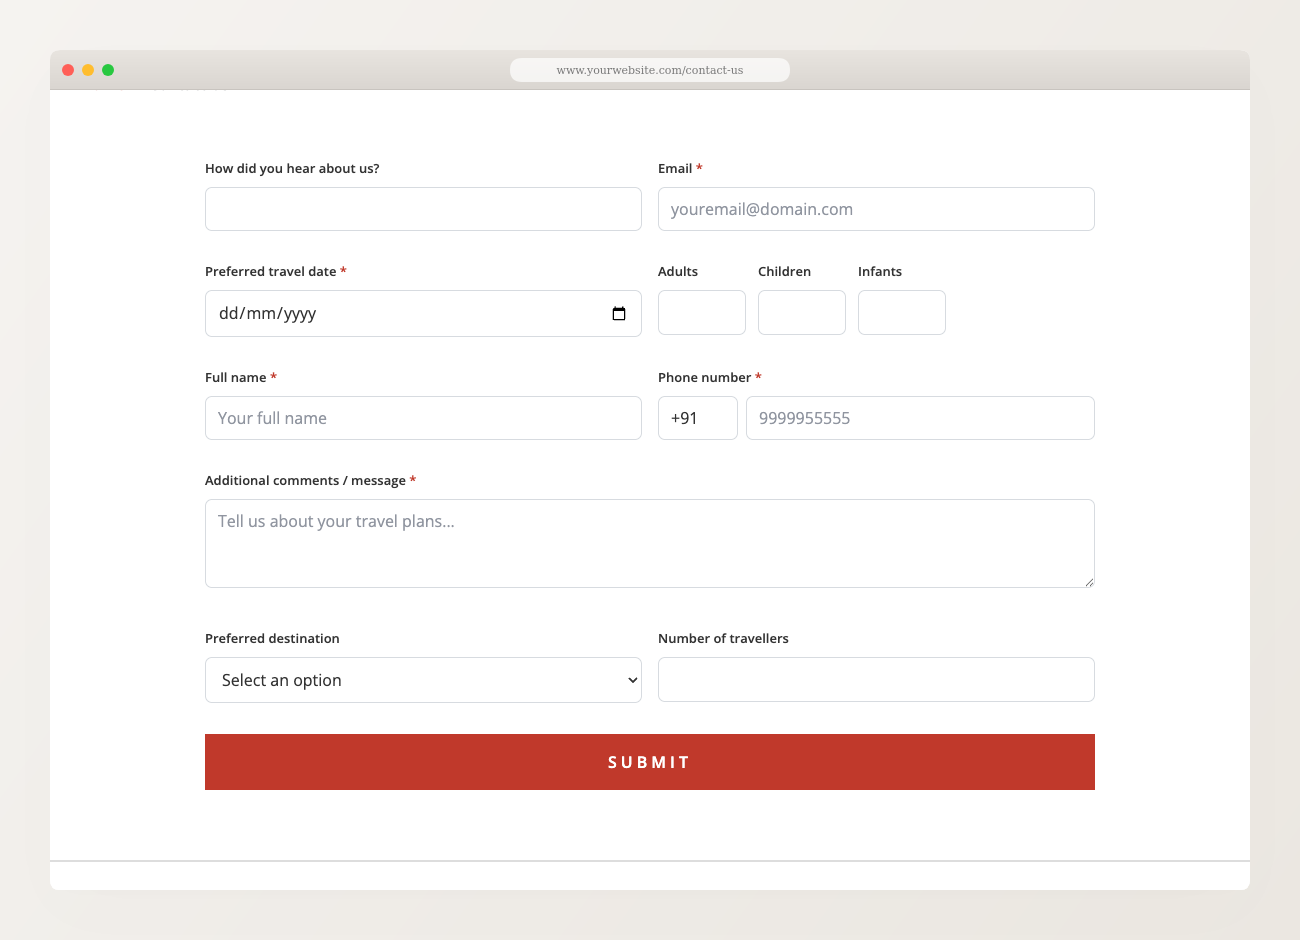
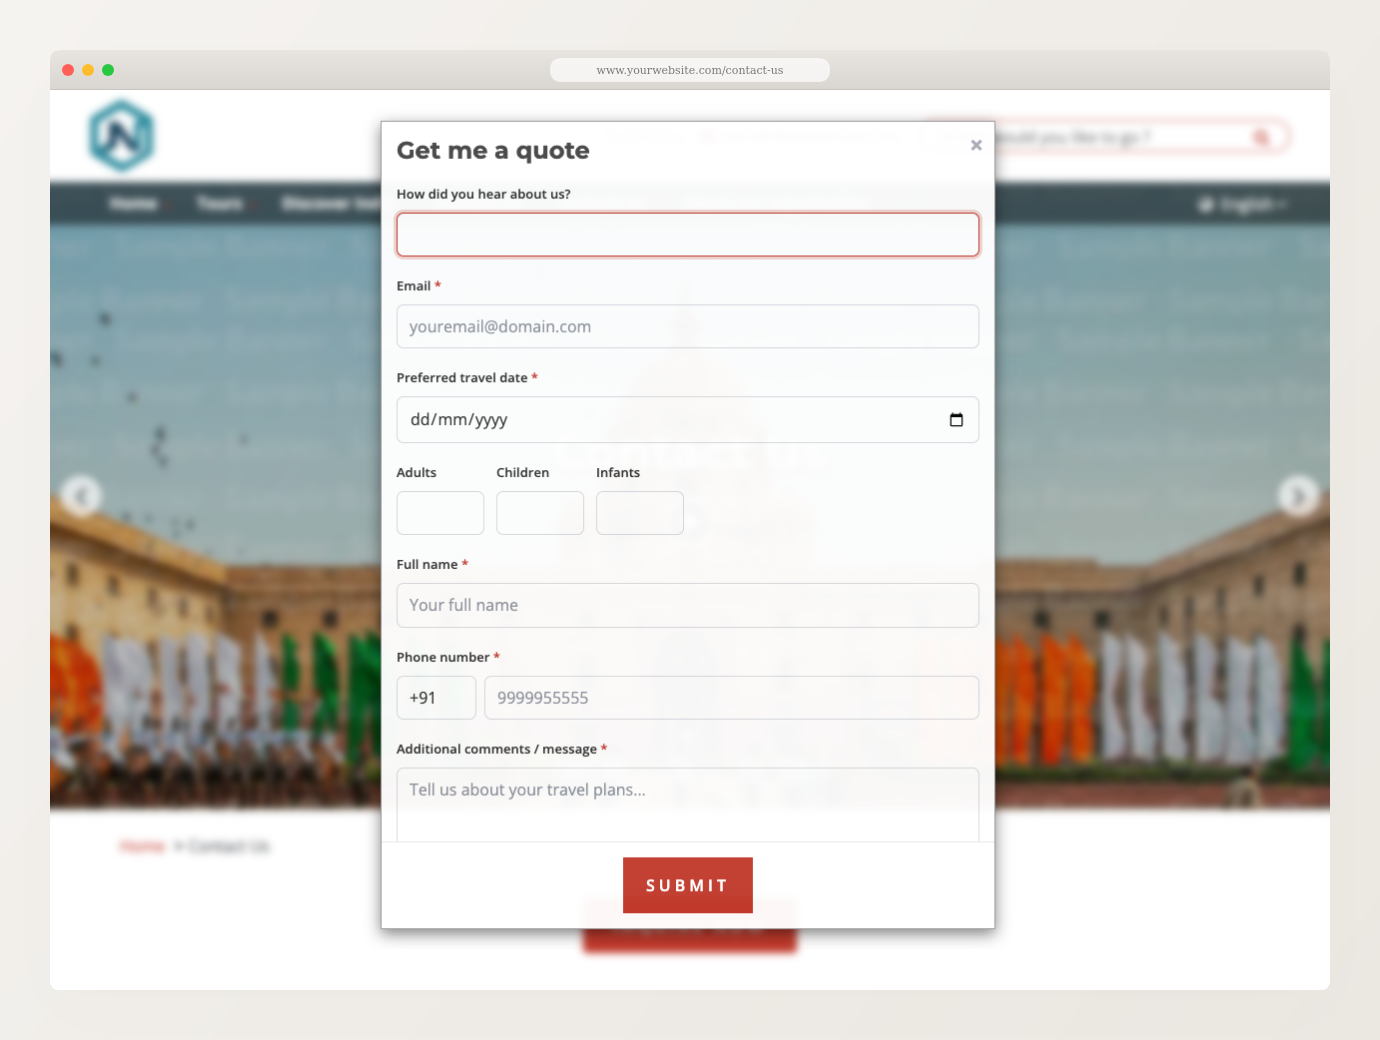
The form picks up your brand colour, fonts, and button style from your website theme, so it matches the rest of your site without any extra styling. A change to your brand colour shows on the form straight away.
Making the form pop up on its own
A tour-page inquiry form can open by itself a few seconds after a visitor lands on the page. An inquiry form is also shown when a visitor downloads a tour PDF, and the download starts once they submit it.
- Go to Main menu > Website > Inquiry Form.
- Select Yes, trigger the inquiry-form automatically after a short delay.
- Set Trigger delay — how many seconds to wait before the form appears.
- Set Trigger cooldown period — how long to wait before it may appear automatically again.
- Click Save.
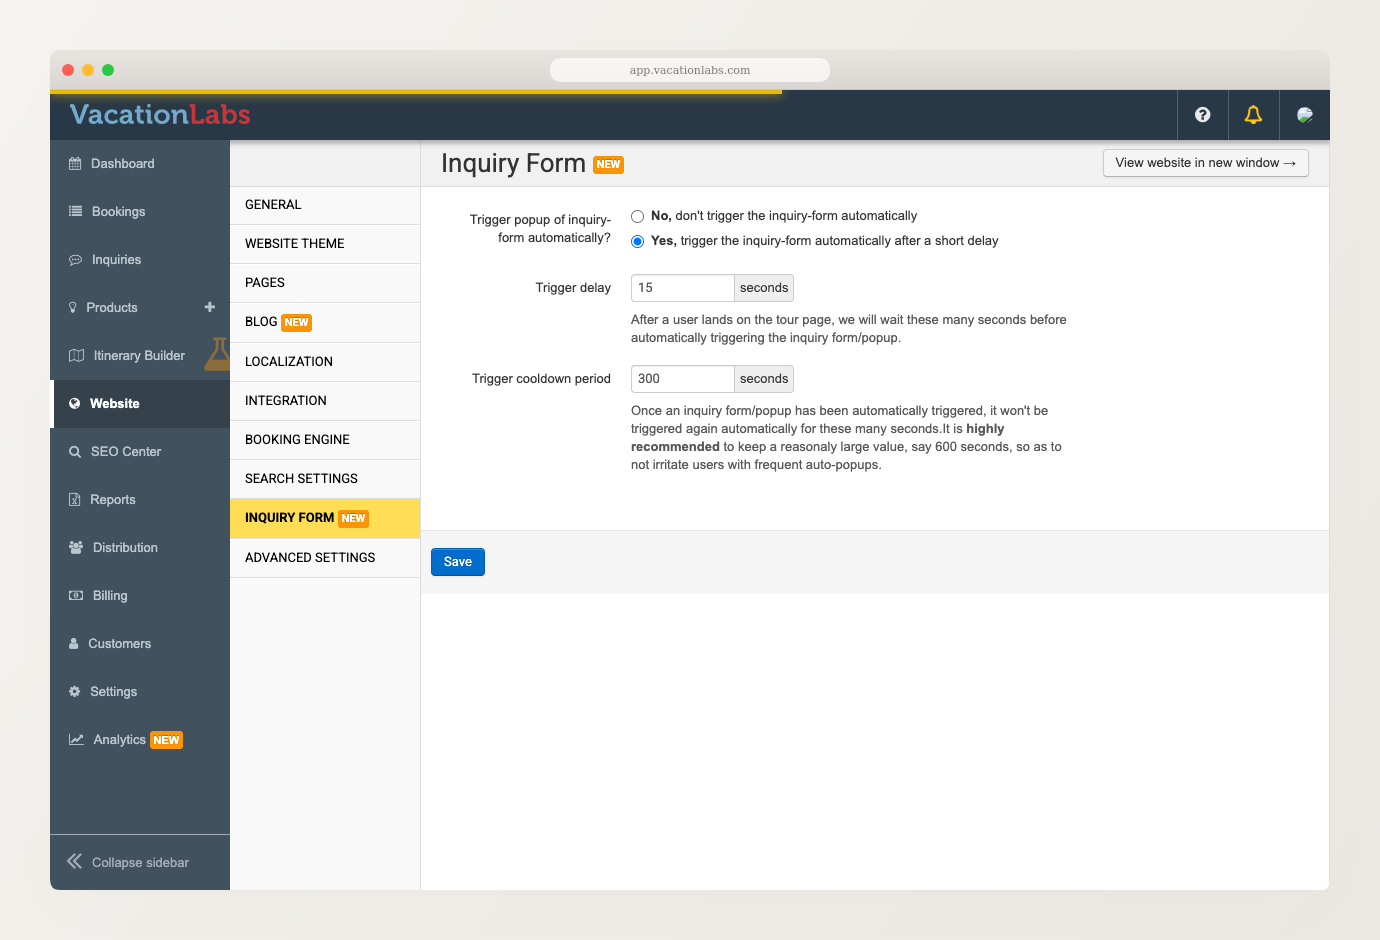
Keep the cooldown reasonably long — around 600 seconds — so returning visitors are not shown the popup again and again.
Spam protection
Inquiry forms include invisible reCAPTCHA. There are no keys to obtain and nothing to configure, and it works for inline forms, popups, and several forms on one page.
Where your inquiries go
Every submission appears under Main menu > Inquiries, recording the details the visitor entered, the trip or page they inquired about, and which form they used. From there you can search inquiries, set their status, assign them to your team, and export them.
See Managing Inquiries for everything you can do with a lead once it arrives.
Related Articles
- Building an Inquiry Form — the fields and settings inside the form editor
- Managing Inquiries — view, search, assign, and export your leads
- Managing Website Sections — add, reorder, and enable sections on a page